Simplify Your Life &
Align with Your True North
Choose Your Path
-

Simplify
-

Introspect
-

Quotes
-

Inner-Voice
-

One-Person Business
-

Financial Freedom

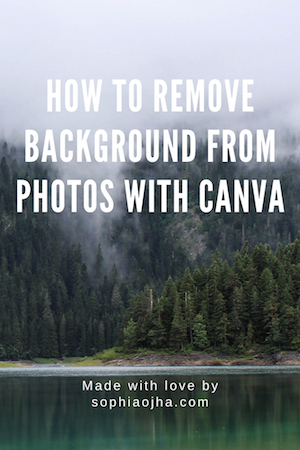
080: How to Remove Background from Photos using Canva
In this video tutorial, I take just over 5 minutes to show you how to remove background from your photos using an app called Canva. Also get the complimentary link to try Canva Pro for 30 days!
First of all, I am so excited to restart my content creation for 2020! After the first two quarters of very busy client projects, I am back to creating new content for you.
In this video tutorial, I take just over 5 minutes to show you how to remove background from your photos using an app called Canva.
Show Me Your Work!
I love to see what you create. So drop in a link to your creation in the commetns below and let me see how you’ve used the instructions in this video,
Peace,
Sophia


061: How to Add Video Clip in the Banner?
Demonstrating a message with moving images rather than just text is a powerful way to set the tone for your site. Adding a video clip to your website’s banner is one way to do that. It creates a certain mood for that specific page and it is easy to set up as you will see in this 3 min video.
How to Add A Video Clip in the Banner of Your Squarespace Website
Demonstrating a message with moving images rather than just text is a powerful way to set the tone for your site. Adding a video clip to your website’s banner is one way to do that. It creates a certain mood for that specific page and it is easy to set up as you will see in this 3 min video:
1| Create the Page You want the Video Banner on
Or if the page is already created, jump to step 2.
2| Click on the Wheel for the Page Settings
This is the icon next to the page name you see in the Pages Panel

3| Jump over to Media
Copy the url of the video you want to play and paste it there. Click save and check how it looks. If it appears narrow like a thin bar, then go into Edit and add a spacer to lengthen the banner. Check the video to where you can visually see how I do this.

Show us what you’ve created!
That’s it, my dear friend! It really is as easy as 1-2-3! I love seeing what you create so hop on down to the comments and show me what you’ve created!
Your Brand New Website!
Are you getting excited to get your own website? I love designing websites for fabulous people like yourself, so take action to get your website design process started —> Start the Conversation by sharing some ideas about your site with me and get a free 15 minute video consultation to discuss your website dreams.
Questions about this blog post? You can drop them in the comments below!
~Peace,
Sophia
Learn How to Build Your Website on Squarespace:


060: Why is the Cart Icon Not Showing up in My Top Navigation?
After I design a website, my clients can still work with me by hiring me on an hourly basis. This blog+video is a direct result of a request my client had after I completed her site. I had created an e-commerce site for her that had a shop with multiple products. My client wanted to have the cart icon show up for her. But she found that to be not a simple click and activate situation. There was one more step to take care of.
If you are using any of the Brine Family of templates and have a product page but your cart icon is not showing up in Design and then Site Styles, then follow the simple step in this video to resolve it.
Why is the Cart Icon Not Showing up in My Top Navigation?
After I design a website, my clients can still work with me by hiring me on an hourly basis. This blog+video is a direct result of a request my client had after I completed her site. I had created an e-commerce site for her that had a shop with multiple products. My client wanted to have the cart icon show up for her. But she found that to be not a simple click and activate situation. There was one more step to take care of.
If you are using any of the Brine Family of templates and have a product page but your cart icon is not showing up in Design and then Site Styles, then follow the simple step in this video to resolve it.
1| Go to Commerce > Checkout
Uncheck “Express Checkout”.
2| Refresh page
You should now see the cart icon show up a) either in the navigation bar or b) as an option under Design> Site Styles> Header: Layout
3| Customize the icon or text
Change the color, size or type of icon as you like.

1| Go to your panel Commerce > Express Checkout. Then uncheck this option.
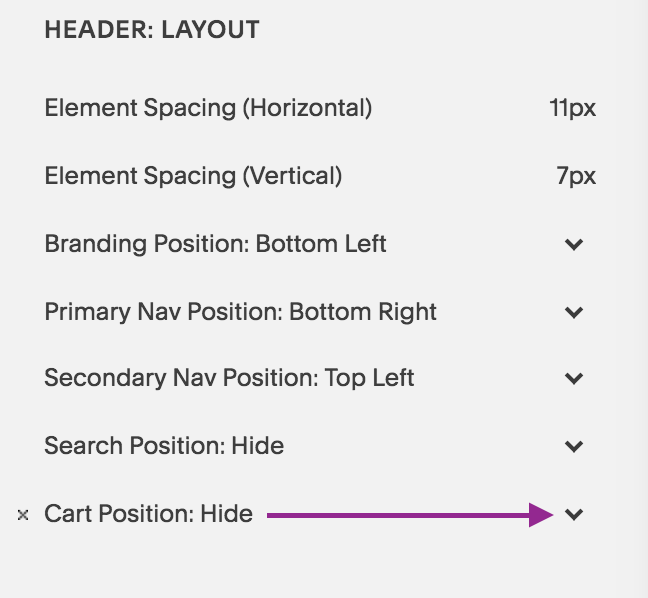
2| b) Click the drop down arrow and change from “Hide” to a position, for example “Top Right”.
Show us what you’ve created!
Again an easy 1-2-3 video. Let me know if you have other questions about this tutorial and I’d be happy to help!
Your Brand New Website!
Are you getting excited to get your own website? I love designing websites for fabulous people like yourself, so take action to get your website design process started —> Start the Conversation by sharing some ideas about your site with me and get a free 15 minute video consultation to discuss your website dreams.
Questions about this blog post? You can drop them in the comments below!
~Peace,
Sophia

059: How to Activate Cart Icon in Your Top Navigation in Squarespace
One of the benefits of a Squarespace site is the ease of the shop functionality. You can have your digital or physical products on sale or you can sell your 1 to 1 services, online workshops (like I do) or coaching sessions.
Now if you want to have a cart icon enabled in your navigation, this blog + video is for you. In this example, I am working with the Rally template but it applies to any template within Brine.
How to Activate Cart Icon in Your Top Navigation in Squarespace
One of the benefits of a Squarespace site is the ease of the shop functionality. You can have your digital or physical products on sale or you can sell your 1 to 1 services, courses (like I do) or coaching sessions.
Now if you want to have a cart icon enabled in your navigation, this blog + video is for you. In this example, I am working with the Rally template but it applies to any template within Brine.
1| Go to Design > Site Styles
Hover over the top navigation and see if the Cart option shows up in the sidebar setting options. You will see under Header: Layout, Cart Position: Hide. Click on the drop down arrow and select the position you want it to show up. In my case, I chose Top Right.
If this option doesn’t show up, that means you need to create a product page with either digital, physical or services items.
Note: If you have a product page but still don’t see the cart option, then you need to disable “Express Checkout” in your Commerce> Check Out options. See how to do this in an upcoming video.

2| Go to Header: Cart
Under Header: Cart, you will see the options for customization show up. Choose from Text, Cart, Cart (alternative), Bag (alternative).
3| Choose Colors & Font to match your design

When you select “Cart”, you can customize these items: font size and style, color of the quantity and color of the quantity text.
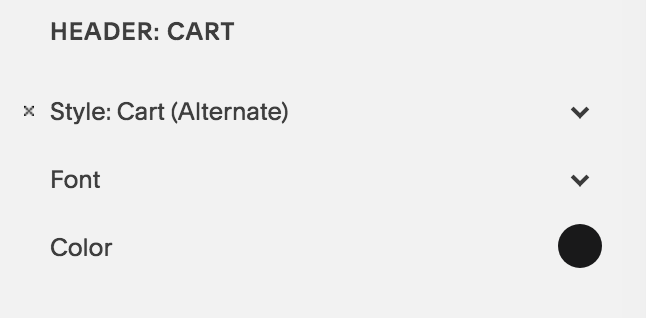
When you select “Cart Alternate”, you can customize these items: color of the cart icon, and the font size + type of the quantity text.

When you select “Bag”, you can change the color of the bag, and the font size + type of the quantity text.

When you select “Bag alternate”, you can change the color of the bag, and the font size + type of the quantity text.

When you select “Text”, you can change the font size and type and the color of font as well.
Show us what you’ve created!
That’s it, my dear friend! It really is as easy as 1-2-3! I love seeing what you create so hop on down to the comments and show me what you’ve created!
Your Brand New Website!
Are you getting excited to get your own website? I love designing websites for fabulous people like yourself, so take action to get your website design process started —> Start the Conversation by sharing some ideas about your site with me and get a free 15 minute video consultation to discuss your website dreams.
Questions about this blog post? You can drop them in the comments below!
~Peace,
Sophia

058: How to Create Double Top Navigation Layout in Squarespace
A double top navigation layout is a great way to separate out your links on the top of your site. This way you can create a visual distinction among your links and space out the links reducing navigation clutter. Watch the video below or follow the steps in the blog to create that look for your site on Squarespace.
How to Create Double Top Navigation Layout in Squarespace
Some links in your top navigation are important but you may not want them to take prime real estate. You may want them to take a secondary position but still stay easily found by your visitors.
How to create such a layout? Enter: the navigation bar above the top navigation.
A double top navigation layout is a great way to separate out your links on the top of your site. This way you can create a visual distinction among your links and space out the links reducing navigation clutter. Watch the video below or follow the steps in the blog to create that look for your site on Squarespace.
1| Go to Design > Site Styles
Hover over the Secondary Navigation to pull up relevant settings. Under Header: Layout, look for “Secondary Nav Position”. Click to choose “Top Left”. This will create its own bar on the top.
2| Primary Nav Position: Bottom Right
Also under Header: Layout, look for “Primary Nav Position”. Select “Bottom Right”.
3| Reduce Padding
Under Header Bottom: reduce the padding to get the right spacing between the new top bar and the Site Title
4| Change color of the White Bar
Click on the white bar. The settings for Header:Top will now show up on in the sidebar panel. Under Background, select the color you want the bar to have.
5| Hit Save 6| Refresh the Page & you are done!

Show us what you’ve created!
That’s it, my dear friends! I hope you will try this layout effect for your site. If you do, I’d love to see it. Drop a link to your page in the comments and share what you’ve created!
Your Brand New Website!
Are you getting excited to get your own website? I love designing websites for fabulous people like yourself, so take action to get your website design process started —> Start the Conversation by sharing some ideas about your site with me and get a free 15 minute video consultation to discuss your website dreams.
Questions about this blog post? You can drop them in the comments below!
~Peace,
Sophia

057: How to Change the Background Color of an Index Section
Are you ready for a little CSS fun? There’s a lot you can do with Squarespace websites and one of them is tweaking the design to create your own customized look - a look away from the templates that Squarespace offers. Today, I am showing you how you can change up the background color of a page or section in your Index collection of pages.
Are you ready for a little CSS fun? There’s a lot you can do with Squarespace websites and one of them is tweaking the design to create your own customized look - a look away from the templates that Squarespace offers. Today, I am showing you how you can change up the background color of a page or section in your Index collection of pages.
Have a look at this super quick video (less than 5 minutes) to see how it is done.
1| Identify the URL Slug of the section
As you will see in the video, the Navigation Title and the URL Slug of your page/section may not be the same. So you first need to collect the URL slug of the page you are targeting.
Notice that I will use the word “page” and “section” interchangeable as both apply in this situation. An Index is a collection of pages. Each page is called a section.
To find the URL slug, click on the wheel icon that is next to the Page you are targeting. Then look for the URL Slug and either copy it or memorize it.
Try and memorize it to train your memory skills - well that’s what I tell myself at least. You can always go back and check if you missed something and you will know that latest when the CSS code doesn’t apply to your section. That’s because the Code never lies! Okay, I am in a funny mood as I prepare this blog (I hope you don’t mind).

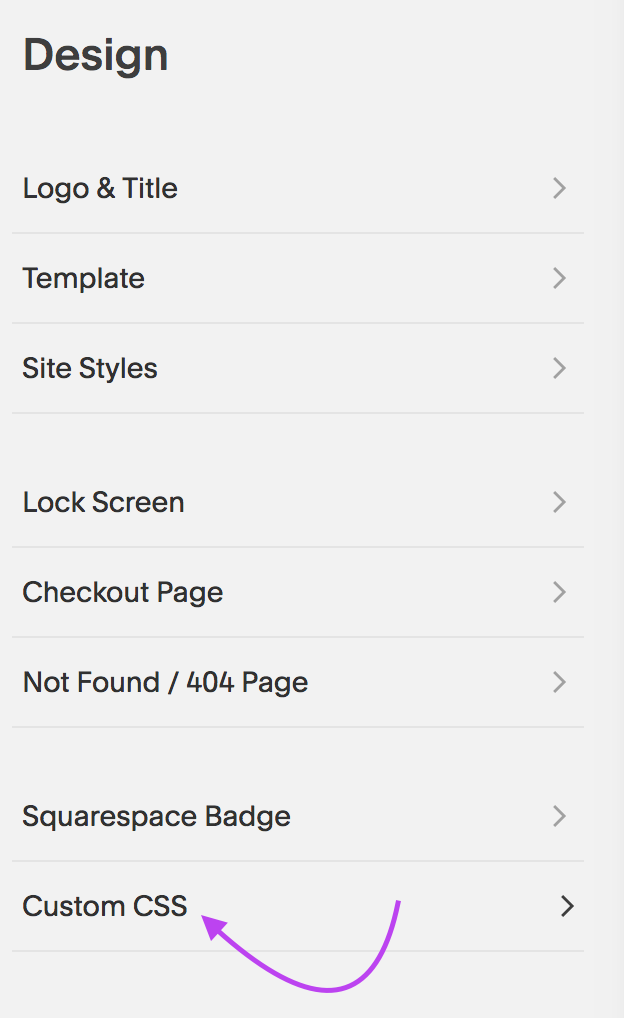
2| Go over to Design Panel
Armed with your URL slug, you will jump into your Design Panel. Instead of heading to Site Styles, go all the way to the bottom and click on Custom CSS. That’s where the magic instructions will be placed!
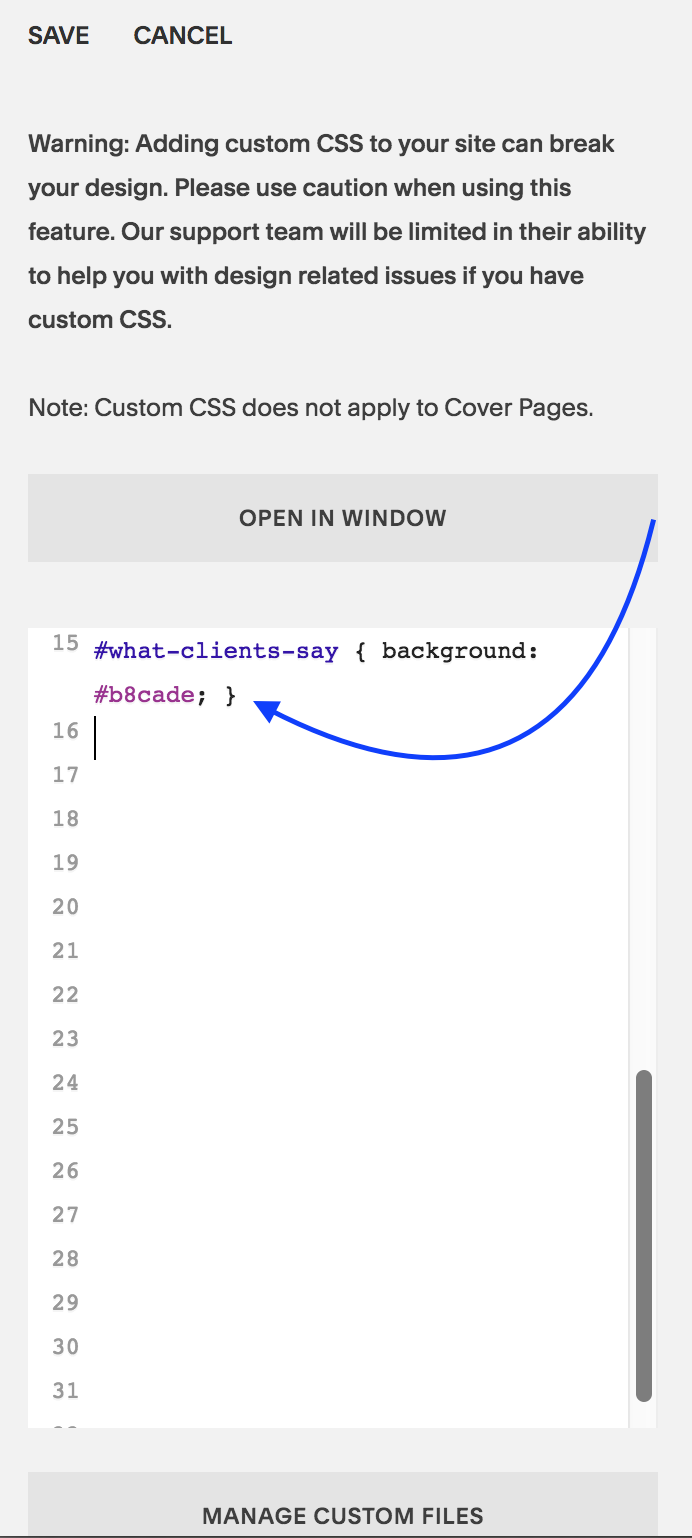
3| Enter the CSS code
Now you are ready to enter the CSS code which should look like this:
#what-clients-say { background: #b8cade;}
Here’s a quick breakdown. Everything after the colon ”:” is what you will be doing. I keep mixing colons : and semi colons ; as you will see in the video. I certainly hope my 8th grade English Teacher doesn’t find out! Hihi!
Enter: #
Next write the URL Slug: what-clients-say
Then open bracket: {
Then write: background
Add a colo: :
Write the hexcode of the color: #b8cade
Add in semi colon: ;
Close bracket: }
Click: Save
Refresh page to see the magic happen!
That’s it, my dear friends! I hope this quick fix pikes your interest in Custom CSS as it really is so so cool!
Squarespace always alerts its users that using Custom CSS code could “break” their website. That’s to be on the safe side. So, I too, am alerting you: Using Custom CSS can break your website. Use it only if you know how to employ the code correctly.
Al’right, that’s enough for disclaimers and such.
Show us what you’ve created!
Changed the background of a section of your Index? I want to see! I want to see! Drop a link to your page in the comments and share what you’ve created!
Your Brand New Website!
Are you getting excited to get your own website? I love designing websites for fabulous people like yourself, so take action to get your website design process started —> Start the Conversation by sharing some ideas about your site with me and get a free 15 minute video consultation to discuss your website dreams.
Questions about this blog post? You can drop them in the comments below!
~Peace,
Sophia