
Simplify Your Life &
Align with Your True North
Choose Your Path
-

Simplify
-

Introspect
-

Quotes
-

Inner-Voice
-

One-Person Business
-

Financial Freedom
117: 4 Ways to Create Interactive Maps for Squarespace
Recently, I had a prospective client ask me about an important feature they wanted to add on their website. Their business offers domestic and commercial cleaning services but only for postal codes within London.
In Squarespace, there’s no in-build way of doing that except of placing a map. So I did some research and there’s a ton of information out there. I sorted through it all and here are my three suggestions on how to add an interactive map to your Squarespace website.
Recently, I had a prospective client ask me about an important feature they wanted to add on their website. Their business offers domestic and commercial cleaning services but only for postal codes within London, UK.
In Squarespace, there’s no in-build way of doing that except of placing a Google map. So I did some research and there’s a ton of information out there. I sorted through it all and here are my three suggestions on how to add an interactive map to your Squarespace website.
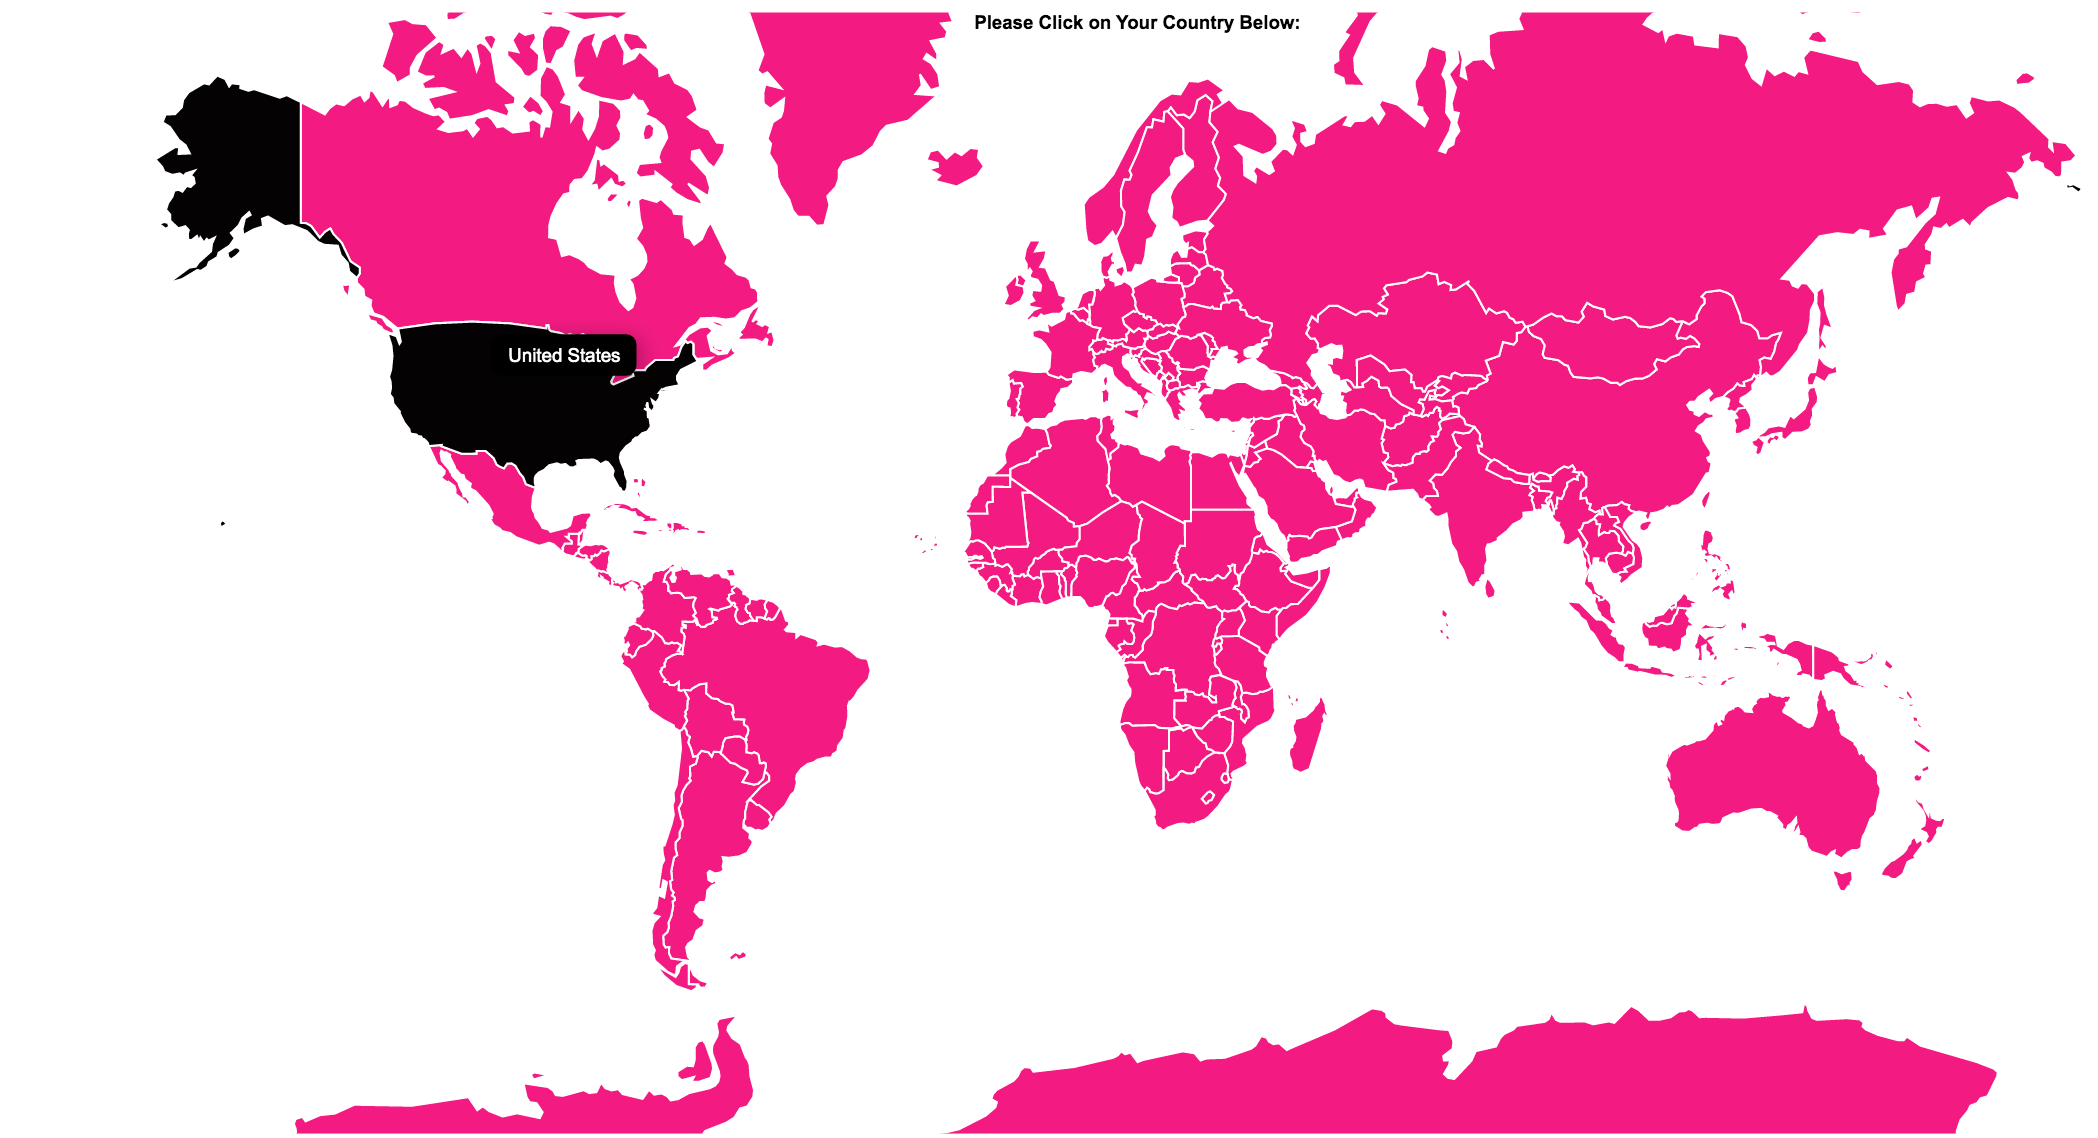
1 | Create A Clickable Map
This is something I saw Pat Flynn show in a YouTube Video. This tool allows you to create a map of the world or different regions of the world. You can add different titles and links for each sub-region and set it to change color when one hovers over a selected region.
The pro is that you can easily create lovely colorful maps with titles and colors. Although, I didn’t see a way to add multiple listings for the same region, say for example if you had three shops in London, you can only add one title.
Also keep in mind that on the World Map, some smaller countries are missing such as Barbados and Saint Lucia in the Carribbean and Mauritius in the Indian Ocean. The tool solves it when you go to the Carribbean Islands sub-region and there you can see those countries but still it doesn’t show up on the World Map. And we just can’t have a world map with the island nations of Barbados and Mauritius and Saint Lucia missing from it, now can we? (No, we cannot!)
Check it out for yourself here:
https://www.createaclickablemap.com/

2| Store Mapper
Here’s a tool where you can upload shop names, addresses and website links and then pull an embed code from the tool to place on your Squarespace website.
You can have a list of multiple shop show up on a map as a database. People can even type in zip code and see what stores are available nearby. It looks very professional and easy on the eyes. There’s no freemium version of this tool nor is there a one-off payment feature which is an important consideration for new small businesses. Instead, there’s a monthly cost which is worthwhile as the tool is pretty impressive. They do have a free-trial.
A special thanks to my colleague, Emma of Queenie Creative over in the UK for informing me of this tool. Emma is a web designer on Squarespace and Wix and a digital marketer. She is also part of the Millionaire Web Designer Directory, a listing of talented designers from across the world. Thanks, Emma!
Check it out here:
https://www.storemapper.com/platforms/squarespace-store-locator/

3| Map Hub
This is a really fun tool to customize your maps. There is a free and paid version of this tool so you can test it out and add more features of the tool as needed.
As the site describes their tool in their own words:
”You can easily make your own map by adding points, lines, polygons, or labels.
Add photos, organize items into groups.
Import and export data in GeoJSON, Shapefile, KML, GPX, or CSV formats.
Embed interactive maps on your website.”
Check out the Explore Maps feature to see examples and then go and build your own.
Check it out here:
https://maphub.net/

4. Good old Google Maps
You can also create interactive maps on Google Maps. You can add multiple points of interest, you can add website links and address, you can then easily embed it on your Squarespace site. It’s free. I have done this for a client before which you can see an example of here: https://www.supervisedparentingtime.org/providers
Customize a map on Google Maps:
https://www.google.com/maps/about/mymaps/

I customized this Map on Google Maps for SupervisedParentingTime.org, a non-profit organization in Minnesota helping parents.
Your Turn:
Have you used any of these tools? Do you have a tool that you like? Let me know in the comments.
Cheers to you and your abundant creativity,
🦄🦄🦄 Sophia
Create Interactive Maps On Squarespace


083: 6 Ways to Save Time in Your Business with Squarespace Scheduling
6 Ways to Save Time in Your Business with Squarespace Scheduling
Workflows. Processes. Systems.
Making the most of these will surely help you save time and streamline your business. But what if you can use a tool that not only saves you time but also opens up a streamlined way to generate new revenue in your business?
Enter Squarespace Scheduling.
Workflows. Processes. Systems.
Making the most of these will surely help you save time and streamline your business. But what if you can use a tool that not only saves you time but also opens up a streamlined way to generate new revenue in your business?
Enter Squarespace Scheduling.
As you may know Squarespace Scheduling is an app that’s integrated with Squarespace and I want to show you a few ways you can optimize it for your business. Those of you who are using Acuity Scheduling, this applies to you as well.
1. Book Complimentary Client Acquisition / Consultation Calls
After a potential client fills out an inquiry form to work with me, I invite them to book a complimentary consultation call. I have my availability set up there beforehand and clients can see which times and dates work for them. If I am in talks with the client via email and we agree on a date and time, I simply send an invite to them directly from the scheduling app by simply adding in their name and email and date of appointment. Since I have zoom integrated with scheduling, I can save time by not having to create or schedule meeting in there. Plus, clients get an automated email with link, date and time all in one.
I email my clients this link: https://sophiaojha.com/book-your-consult-call
It looks like the image you see on the right.
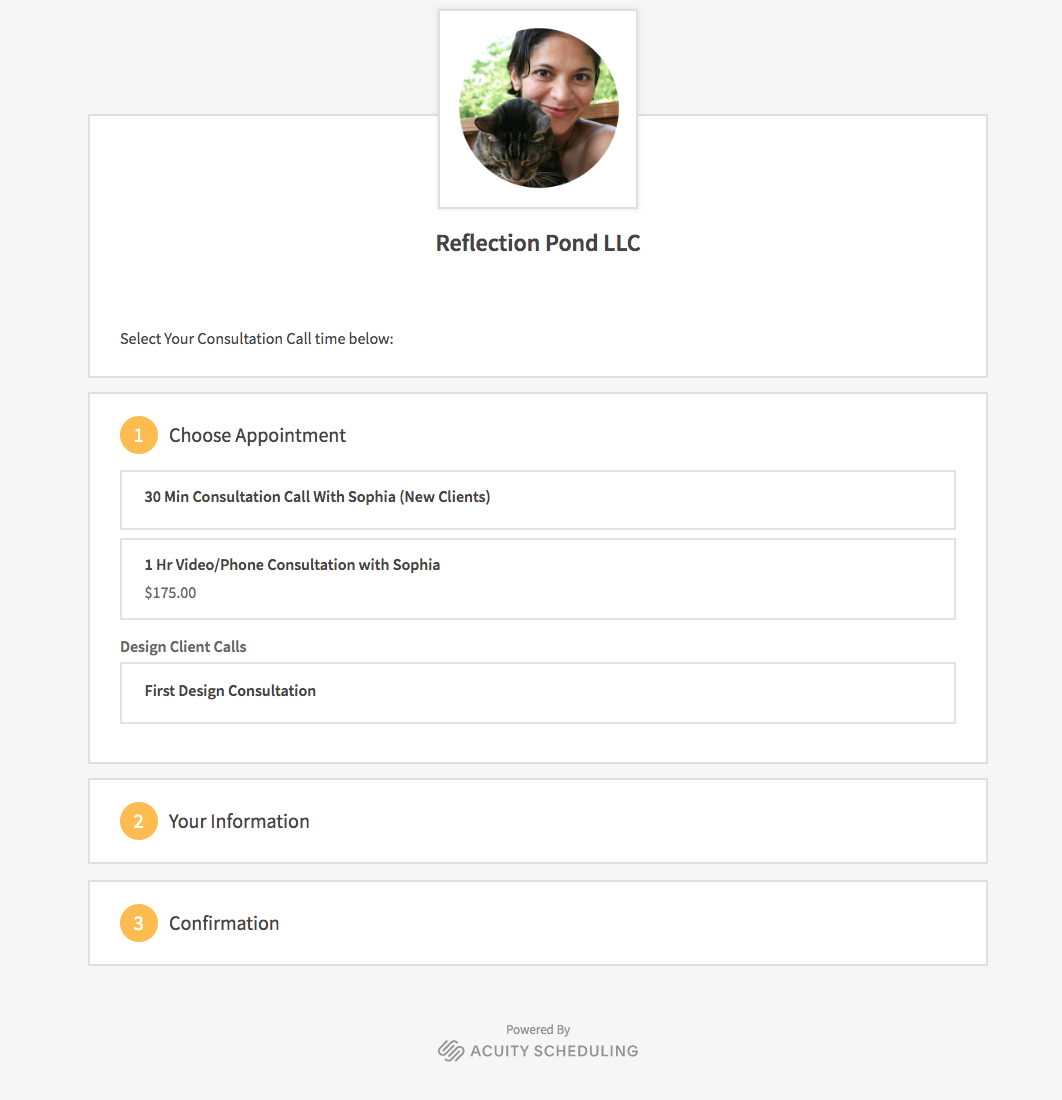
Click the image to go see the direct link live.
2. Book Paid Consultations
I don’t use this so often myself yet because clients often purchase a package with me which includes both implementation time as well as video consults and so I play it by ear and send them a zoom link for our meetings. But I have it set up just incase clients wanted to book right away. So if you wanted to block off set number of hours each week for paid consultations, this would work really well. Again it is all integrated with zoom and you preset your availability in the Scheduling calendar.
3. Book a Room or Facility
This is perfect if you have a facility where you book out different areas. I recently set up scheduling for a Canine Learning Center where their clients can book an indoor diving pool, a training course area and an outdoor pool.
Because of Covid, the owner needs time after each booking to block of half an hour for disinfecting the area and so that can be set up as well so no one can book in that half hour window right after another one client. That’s a super detailed feature that Squarespace Scheduling/Acuity provides and has come in really handy for this client.
You can go see the example live here: https://www.ink9lc.com/


4. Sell Online Zoom Yoga Sessions
Another client of mine is a yoga studio Canada who had to move everything online. Because of the nifty integration with Zoom, yoga studios can create an entire online calendar with all their varied class offerings. Yoga students can select the class they want to join, pay online and get an automated email with their unique zoom link.
The unique zoom link makes sure that only those who have paid can join the event. Plus, the Yoga Studio can creating a waiting room in their overall Zoom settings to admit only those who are on their list, for added privacy/security needs.

This is what the calendar looks like with all the weekly sessions. Check it out live: https://www.jadayoga.com/online
5. Sell Class Cards or Monthly Passes
Another feature of the Scheduling integration is that you can sell Class Cards or Monthly Passes. So for a yoga or fitness studio, this comes in handy. Let’s say the yoga studio offers Hatha Yoga, Iyengar Yoga, Vinyasa Yoga and Kundalini Yoga classes offer by different teachers. Then, they can set up a monthly pass or a weekly pass so that students can pay in advance and select from the different class offerings. Inside Scheduling, you can set up the limit based on the number of classes or the total amount. For example, you can select whether you want to have say 25 classes included in the Monthly Pass or allow students to select as many classes as they like until the value of $125. The app will keep track and once they hit the limit in the Monthly Pass, the students cannot book any more classes. You can also allow for a rollover to the next month of unused time or money. Pretty cool feature!

Check it out at: https://www.jadayoga.com/online
6. Design Consultation and Check-ins with Clients
During my two week design workflow, I meet with my clients on Zoom multiple times. We start off with a first Design Consultation on the first day and we wrap up with a Launch + Training Call on the last day. And in between these two sessions, we can meet spontaneously for quick 10 minute check-ins to review something or clarify a question. For my design clients, I simply email them a Zoom link that can be used repeatedly. But the first and the last consultations are booked via the scheduling app so that they can select a time that fits best for them.
I hope these are some good ideas for you that can help save you time, easily receive payments and streamline your workflow. Let me know if you use this already in your business and what questions you have run into.
Peace,
Sophia

082: How to Open A Free Trial on Squarespace - the Exact Steps Demo
How to Start A Free Trial On Squarespace
It’s important that you get a feel of the website building platform before you go ahead and hire a designer or start building your website yourself. So how do you do that? Start with a 14 day free trial. You won’t need a credit card. Just an email address.
So here’s how.
There are at least 5 good reasons why I think so:
It’s important that you get a feel of the website building platform before you go ahead and hire a designer or start building your website yourself. So how do you do that? Start with a 14 day free trial. You won’t need a credit card. Just an email address.
So here’s how to get started with a new a trial account.
Watch the video or read the article below it.
1| Click on my 14 Day Free Trial Link
Now, if you like my free videos and the help I am providing, you can use my affiliate link to start your account. I will get a little something only if you choose to purchase a plan but it will cost you nothing. So consider starting a trial site from here:
14 Day Free Trial for US residents:
https://www.sophiaojha.com/squarespace-us
14 Day Free Trial of International Residents (Non-US):
https://www.sophiaojha.com/squarespace-world
Alright, now you will land on the Squarespace website. Click on “Get Started”.
2 | Now you go to Templates.
You can either click on one of the categories on the left as your starting point. Or preview the templates here.
Now as of July 2020, what you see here are all Squarespace 7.1 templates. There really is no difference between these templates in terms of what they can technically do. So if you start with any of the templates here and want to create the exact about page layout that is on a particular template, you can do it on any other other 7.1 template. They are all different starting points and you can create what you want with ease. Think of templates as your easy starting points not set-in-stone endpoints.
Just a note, if you know and heard about Squarespace 7.0, the predecessor of 7.1, you can find all those templates down at the bottom of the templates page. Look for the link saying “Looking for earlier versions? Click here” or something along those lines.
Now, when I build new websites I still build them on 7.0 and so do many of my colleagues only because we have found a certain list of things that are better done in 7.0 than in 7.1. But if you are a DIY’er and want to put up a website fast, don’t worry about 7.0. You can choose a 7.1 template. If you plan to hire a designer, know that they may still want to build your site on 7.0 and that’s because they can do a lot more design wise without having to resort to coding.
Alright, so now you pick your 7.1 template or your 7.0 (earlier version) template.
And then follow the directions.
Al’right so that’s it. That’s how you open up your brand new website account on Squarespace. Go ahead and start building your first page on your Squarespace site. And again if you like the free content I am putting out here, consider opening a trial account through my affiliate links (see above). And I thank you a ton for doing so.
Bye for now and see you in the next video!
Al’right, so what’s the next step?
1 | Sign up for my workshop Squarespace Fundamentals
In this 90 minute workshop, I show you how to navigate your new Squarespace website. You will learn how to create a new page, add text and photos and understand how to use the different content blocks. This is a training of the 7.1 version of Squarespace.
See all details of the workshop here.

Get Started on Your Dream!
Start your Squarespace website and let me know how it is coming along. Drop me a line in the comments and share with me what your business is and what you want to create.
Peace,
Sophia

081: 5 Reasons Why I Love Squarespace: The Best Website Builder for Online Entrepreneurs
5 Reasons Why Squarespace Is the Best Website Builder Out There for Online Entrepreneurs
As you might have guessed, as a Web Designer who specialized on Squarespace websites, I am a big proponent of Squarespace for building your online presence. If you are an entrepreneur of any kind - whether you are an author, an artist, or a creator or if you are someone who has an idea, someone who wants to inspire and impact positive change, Squarespace is your platform - the best platform in my opinion and experience.
There are at least 5 good reasons why I think so:
As you might have guessed, as a Web Designer who specialized on Squarespace websites, I am a big proponent of Squarespace for building your online presence. If you are an entrepreneur of any kind - whether you are an author, an artist, or a creator or if you are someone who has an idea, someone who wants to inspire and impact positive change, Squarespace is your platform - the best platform in my opinion and experience.
There are at least 5 good reasons why I think so.
Watch the Video below or Read the Text

1. Squarespace was designed for DIY’ers. (Do-It-Yourself)
Squarespace was designed with you in mind - you, the creative business person and not for designers or developers. You are in the foreground of everything they do. In fact, that’s why they have over 80 professionally designed templates for a variety of niches so that you can pick any one of them and be off to the races. In fact, the newest version, Squarespace 7.1 had made it even easier for DIY’ers to build their website by making it more streamlined and user-friendly.
2. Squarespace customer service and help line
My experience of Squarespace support has been exceptional. You get a lightning fast response and the team is highly skilled not only in the topic but also in customer service skills. I’ve reached out to them and there has n’t been any issues that was not resolved. Having a professional team that is there to support you with your questions and helps you troubleshoot is priceless. Plus, there is a huge online collection of guides and video tutorials that their team has published that will be a good starting point for resolving your questions. Their knowledge base articles are detailed and highly useful and I have myself used them a lot.
3. Squarespace has a community behind it.
What do I mean by a community? There’s a community of web designers, web developers and bloggers who have put out tons of useful content on their blogs. They have created tons of video tutorials on YouTube and they have created workshops, programs and online courses. These are all packed in value and offer a huge resource at 4 am in the morning when an idea hits you and you want to run to your computer to implement it. This is important because it shows that Squarespace has already been tried and tested by thousands of users. And they are testament to the value Squarespace provides. See a directory of Squarespace Designers put together by my colleague Erin Neumann here: https://www.bealignedwebdesign.com/best-squarespace-web-designers
4. No coding, no design experience needed.
As I mentioned in point one, Squarespace is geared towards the non-designer. So you can create a highly professional website just by using their templates as a starting point. That means you do not need to know any HTML or CSS nor do you need a design-eye. Just switch out the template photos and content and you have a website that looks stunning and can get you started. This is the first barrier that is removed. Of course, you can do a lot to move away from the template and make it look more unique and fresh. But that can always be done in phase 2. It is so important to get started building your SEO (Search Engine Optimization) with your content and blogs. So my recommendation to you is just go and build your 5 most important pages and then you can tweak the design and make it all cool gradually.
5. It’s an all-in-one platform.
This is a really important point. Running an online business means there’s so much to think about and take care of. Then on top of that if you have a gazillion apps and third party integrations, then it just makes your business life very dense and complicated. And you didn’t get into business for more complication, I am guessing, but rather for optimizing your time, streamlining and powering up your life…to make an impact and grow your revenue, not to sort through hundred million different apps, right? That’s why Squarespace is really useful because you can do everything in one place: grow your email list, send out weekly newsletters, sell your services, sell your digital/physical products, demonstrate your expertise via a blog or podcast, host your online course, schedule free discovery calls with potential clients, sell paid consultations, run your website analytics, and so on and so forth. It’s all here in one place.
I run to websites on Squarespace, one you are on right now: sophiaojha.com for my web design business and the other for my site about mindfulness and meditation: reflectionpond.com which is the reason I got into online marketing and web design (I wanted to learn how to promote my meditation programs and that’s how I got into learning about web design…if you want to know more about that journey, see my Manifesto page).
Al’right, so what’s the next step?
Take it for a Test Drive.
Take it for a Test Drive. Just like you can take a car for a test drive, you can try out Squarespace for free. No credit card needed. Select your location below and start a free trial and play around with it. I will be posting more videos to show you how to create your first page on Squarespace so look out for that. Try it before you buy it!
14 Day Free Trial for US residents:
https://www.sophiaojha.com/squarespace-us
14 Day Free Trial of International Residents (Non-US):
https://www.sophiaojha.com/squarespace-world
Get Started on Your Dream!
Start your Squarespace website and let me know how it is coming along. Drop me a line in the comments and share with me what your business is and what you want to create.
Peace,
Sophia

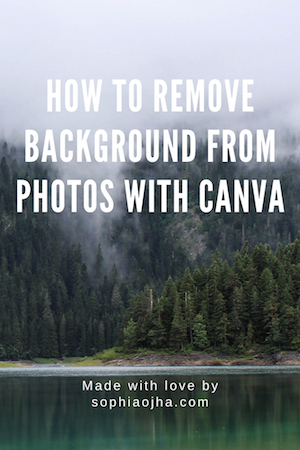
080: How to Remove Background from Photos using Canva
In this video tutorial, I take just over 5 minutes to show you how to remove background from your photos using an app called Canva. Also get the complimentary link to try Canva Pro for 30 days!
First of all, I am so excited to restart my content creation for 2020! After the first two quarters of very busy client projects, I am back to creating new content for you.
In this video tutorial, I take just over 5 minutes to show you how to remove background from your photos using an app called Canva.
Show Me Your Work!
I love to see what you create. So drop in a link to your creation in the commetns below and let me see how you’ve used the instructions in this video,
Peace,
Sophia

079: The First Two Steps To Creating Leveraged Passive Income With Digital Products
Let’s begin with a pop-quiz!
Pop-Quiz: If you want to create a passive income stream with digital products, which of the following do you think would be your first two steps?
Pick from the following options…
Let’s begin with a pop-quiz!
Pop-Quiz: If you want to create a passive income stream with digital products, which of the following do you think would be your first two steps?
Drafting an outline of your online course
Deciding which format your digital product should take (audio, video, course, membership, etc)
Break writer’s block by just start writing your first chapter of your course
Review which online course platforms are the best for your business?List of equipment you need to buy for creating your digital product
Which third-party integrations will you need on your Squarespace website for selling your course?
Figure out how to price your digital product
Should you go on launch mode or evergreen it?
Yes, you will need do invest time and thought into these areas before you create your digital product. But none of these makes up the first two steps. Before you do any of the above steps, you first need to 1. find out what problems your own clients are asking you to solve for them and 2. find out if someone will pay for your digital product.
Step 1: Figure out what solutions my clients want
Step 2: Find out if someone will pay for your digital product
Let’s dive into each of these one by one.

Step 1: Find out what your clients want
You see, you have so much to teach and share that you could probably begin drafting an outline for an online course in a single afternoon, if you really wanted to. But what I found out from my year and half of online course making adventure several years ago is that, as much as you need to teach what you know, you also need to align it with what the market wants. I am not saying that the thing you want to make needs to be already have existed because with that logic the light bulb would never have been invented, nor would have the airplane. Or any of the millions of new innovations that continuously come into being. But they all came into being because there was a need for it, a yearning for it in some form or the other. The end result or the product that you create doesn’t necessarily need to be existing previously. But the problem that your product solves, now that, that does need to be existing previously.
The end result or the product that you create doesn’t necessarily need to be existing previously.
But the problem that your product solves needs to be existing previously.
So when it comes to creating your first online course, it is important that you know what problems exist. And more importantly, what problems your own paying clients are asking you to solve. That information is evident in the kind of things people are paying you for because a service provide you are closely aware of what you are getting hired for. This not only will help you for example to create a customized service package but it is very useful for another reason. And that’s this: if there are folks who are paying you for a custom solution, then there are surely multiple others who want that as well but cannot ask for a customized solution for it. That’s where you can create leverage with a leveraged product.
Example 1: For example, let’s take the example of a web designer, named Sophia (…see my head nodding). For every one person who hires me to custom design their website there are many others who are learning how to build their own site DIY (Do-It-Yourself) style. So if you are web designer, can you think of a solution that serves the DIY people and can instantly leverage your time and efforts? Perhaps, a 4-week mastermind to build their website or an online course that walks them through each part of the website building process. Now, you can serve a lot more people and you have leveraged your time and efforts while increasing the business’ bottomline.
Example 2: Take another example: a programmer, named Alex, who is hired to create high-end custom code for individuals. How about a portfolio of standard code products that are at a lower price point than the custom solution but can be used by more than one person. Instant leverage!
Example 3: Or think of a master hand lettering artist, named Shawna, who gets commissioned by big corporations to come in and create hand made unique art on large walls in their lobby. She can think of teaching other hand-lettering artists on how to get commissioned by big corporates. This could be a six month online coaching program that may even be a high-end offer but has instantly leveraged her time, while attracting very serious artists who want to take their art career to the next level. And it’s all digital with pre-recorded sessions interspersed with some live laser coaching.
Example 4: A piano teacher, named Robin, does live three-week group courses to teach beginners how to play the piano. They then move on to an intermediate course where they have established themselves further in their piano skills. Now she knows that she has students who love her teaching style and have already come to her for beginner and intermediate group courses. She knows they are hungry to get good at their craft with HER help. This is where the digital product leverage kicks in: she can create a VIP three-month deep immersion course to help build up their repertoire. This immersion course could be designed as an online course with three modules over three months. Each month they master one module, with a video per week that contains short weekly assignments to complete/practice. At the end of each month, they come together in a live zoom meeting to ask questions and to demonstrate how far they have come with their skills. And they repeat this for each module. At the end, they have three distinct pieces mastered, say one from Bach, one from Mozart and one from Beethoven. Or let’s say the whole three months is about Bach and then the can go to Mozart in yet another three month program and then Beethoven in another three month program. And now you have a 9 month immersion program! This could even evolve into high-end in-person retreat type offering eventually.
Now do you can see what I mean? We need to understand what we are already being paid to create and then extrapolate from there. Take whatever you are already doing for your current clients who are paying you big bucks to do it and then think of how you can translate that into a digital product that can be purchased by a lot more people, thus, leveraging your time (you make the thing once) and generate on-going revenue from it (launch it or do it evergreen).
Actionable Task 1: Take Inventory of Your Past Client Projects
So alright, you may ask, ”What is the actionable step from this?” Well, the actionable step is to answer this question: What are your clients paying you for?” Take inventory. Make a list of past client projects that you got hired for. Then see what they look like. Now you if you are a business coach, you may say, “all my clients hired me to help their business get to the next level.” If you are web designer, you may say, “all my clients hired me to design websites”, or if you are a piano teacher you may say, “my students hired me to get good at their technique”. Okay, that’s a nice response. Perhaps I should specify and articulate my question better:
Q: What common thread do you see in the projects you got hired for in the last six months?
Maybe your coaching sessions were all about figuring out a niche, or on how to create a service package to attract clients.
Maybe your piano students were all self-learned students who now wanted to develop their technique, or some wanted to master reading music or they are mostly high-school students wanting to prepare to get into advanced music school.
Maybe you designed a string of websites for non-profits, or authors and coaches, or yoga and wellness instructors.
Action Step: Make a list of past client projects that you got hired for. And see what common thread you see in the projects you got hired for in the last six months. Circle, highlight, or underline similar projects and you will get your answer.
What to do if you don’t have paying clients yet?
Now, if you are at the start of your entrepreneurial journey, the main goal then is to get clients and get paid for your services. Digital products can come but they may not take center stage right away because you still need to validate your business and see if there’s any traction. An avenue for research for those just starting out is to see what people are writing in the comments of your own blogs or of your colleagues, what are they asking you on your social media channels or on others channels in your niche, and you can even search what questions people are asking on forums like Quora or Reddit or Facebook groups. Are there people wanting to pay for your particular service offering at all? You need that to happen first, right?
The bills gotta get paid and in my experience, the fastest way to create revenue from an online business is to offer a customized one-to-one service for clients. Now, if you create physical products, that’s a whole different ballgame and I have no experience in that area, so I will leave that topic for another expert to talk about. But what I do know from my own experience as an online business owner who started offering services first, is that when I got my first $90 to setup a ConvertKit account back in 2016 for my very first client (majorly underpriced, but hey it was a start), that’s when my business was born. Getting the revenue doing services for individual clients then created the momentum for me where I could then begin to think of leveraging.
The fastest way to create revenue from an online business is to offer
a customized one-to-one service for clients.
Are you on a hamster wheel of serving clients?
As satisfying as working with clients can be, it also made me realize that I was still trading hours for dollars. Nothing wrong with that, at all. But as soon as I was finished working for a client, I was back in client acquisitions-mode which often felt like starting from scratch. And I’d wonder if this is the point in the journey of a business owner that the thought aries, “How long can I sustain this? What if I could leverage my time and create new ways to generate passive income?” It certainly was for me.
Even a $1000/per month of passive income can mean a huge boost for any business that is under six figures. And that’s when we start dreaming of digitizing. Is that how you feel? Well, my friend, I know exactly how you feel. So if you don’t yet have paying clients, roll up your sleeves and get that first client. If you already have clients but feel you are stuck in the never-ending cycle of serving clients then working on acquiring clients, then serving clients and back again on the hamster wheel, I’d say try to find an outlet of time, a window of time, during the day when you plan your exit from this exhausting cycle. Yes, it’s great that you are running your own business and doing what you love but you also built your business for time-freedom not just money-freedom, right? So be patient while you are in it, but start scheming your digital leveraged product adventure at any free moment you get. Serve one-to-one clients now but keep in mind the big picture of where you want to go with your business and consider how serving one-to-many digitally can be a viable route for your entrepreneurial journey. Alright, now let’s continue with step no. 2.
Step 2: Find out if someone will pay for your digital product
Okay, so back to the steps you need to take for your leveraged digital product creation. Let’s say, you have identified your most common projects you got hired for. For the sake of example, let’s look at the piano teacher, Robin, who offers individual piano trainings. Now she does the actionable task from step 1 (see above) and finds out that 70% of her students are high school seniors wanting to prepare their college application audition video to get into music school. She still has a good percentage of self-learned adults who always wanted to learn piano from a trained instructor and that’s a good bulk of her clients. But the 70% of college-wannabes is a good segment that she can start thinking about specifically.
Robin could start strategizing what type of a digital product she should create for the 70% of her students who want to prep an audition video that shows their piano skills for their college application. Her digital product could be a summer intensive that students join during the summer before they begin college applications. It could be made up of modules in which she helps them to pick out the music pieces that they would include in their audition video, guides them on practice habits and how to create a schedule of practice, guides them on the right recording equipment they need, and all the way to finally recording the application video and getting it ready to send out come September.
An alternate approach would be for her to first create a series of live online workshops for each module. With a live audience you can tune in (no pun intended) to what the piano students are asking. Then after the live session are over, she can get back to her desk, review the recordings and then create clean video modules. By the way, this is exactly how I created my Host Your Online Course program in 2019. This approach turned out to have so much less pressure for me because now I could create the content as I went instead of having all the videos pre-recorded. Watch this video where I explain how and why I decided to take this route.
Now at this stage where she has come up with an idea for an online workshop or course, it can be tempting for Robin to jump into actually creating the digital program. But this is exactly what she should avoid. The next step would be to write up a sales page that articulates all that her program would contain. Now for me, I go straight to the backend of my Squarespace website and start creating the sales page. For some others, it may be best to take a notebook or open up a word/pages file on their computer and start writing. The idea here is to get the details on to paper and then on to your website. This also gives you an idea of how you want to price it because you see all the components of the offer laid out in front of you. Then, send an email to your students either individually or if you have built an email list, send an email to the people on your email list with an early bird invitation. Again, the format could be an online course or a series of live workshops.
You’ll notice, that at this stage, you have not created a single module. You are simply pre-selling your course/workshop before you create a single slide, any other digital component of it. The only thing you will have created is the sales page with the offer expressed in detail.
This method is not new and I am not the first one to be using it. I discovered it through my own trials and errors of course-creation, where I jumped right into creating a massive course and then painfully found out that there were no-takers. Pre-selling is an easier and much faster and low-risk way to find out if there’s traction for your idea. Create the sales page with an early-bird pricing offer and send it to your audience. If no one purchases, you need to get back to finding out what you need to change. It doesn’t mean that your idea was not useful or good, may be your audience is not big enough or your sales page was not impactful or you may need to tweak some other aspect of understanding what your audience wants. Once you have real people putting out real money for your offer, that’s when you have real evidence that what you are offering is wanted by your audience and it goes beyond just an interest in your offering.
Pre-selling is an easier way to find out if there’s traction for your idea.
Create the sales page with an early-bird pricing offer and send it to your audience.
Actionable Task 2: Validate your idea by pre-selling
After you’ve taken inventory of the common thread of hired projects in the last six months, think of what is the main challenge that your clients have asked your help for. Now, you can brainstorm a way to leverage that solution so that you can serve many people by creating something once. This could be a series of live group workshops as I hinted in the earlier section. But it could also be an online course. What’s important though is to see if someone will pay for it. And the way to find out is to make the offer to your audience (current clients or folks on your email list). Now if it will be an online course, make sure to plan your time wisely and clearly say on your sales page when the course will be released. And remember things often take longer than we had planned, so add in a good buffer of extra time.
Action Step: Write out what your digital product will consist of and what it will achieve for your clients. Create a pre-sell sales pages and add it to your website with early-bird pricing. Invite your your students individually or send the invitation to your email list.
How to create a pre-sell sales page
I think when people hear the term, “sales page”, they get a bit uncomfortable. First, because the idea of selling can be uncomfortable, and second they may not know what to put on a sales page. Now I should perhaps write another blog all about how to write and design a sales page, but for starters, let’s not complicate it. The sales page that you write to test your new product needs to have at least the following six things:
1. Tell clearly what the program/digital product will do for them: the benefits
2. Outline the different modules and what it contains: the features (videos, pdfs, action plans, worksheets, audios)
3. Note any timelines if it’s a live workshop, example: The program starts on July 15th. Early-bird ends on July 1st, etc.
4. Clearly state what it costs $$ and how they can purchase: purchase button, or by application.
5. What some other students have said: testimonials (if it is a first launch, add testimonials of your other trainings, services or offerings).
6. An official bio and a nice smiling photo of yours.
You can always embellish this but start with the basics and then build upon it. I have myself fallen in this trap of perfection. This really is a mental vice, not exaggerating here. To fall in the trap of perfection is a game of the ego that only causes you hurdles on your path to progress, under the guise that it only wants to make sure you look good to others. Dare to look bad, look imperfect: that’s better than not have anything created at all. (Okay, I am finished giving a pep talk, but more than you, it’s mostly likely, me who needs to hear this right now).
To fall in the trap of perfection is a game of the ego that only causes you hurdles on your path to progress, under the guise that it, the ego, only wants to make sure you look good to others.
Vanity ≠ Progress
Your path to creating leveraged passive income starts now
So I’ve outlined for you a possible path that you can take for creating your leveraged passive income. It’s now time for you to take action on it. It begins with first figuring out what kind of solutions your clients want, finding the common thread in the type of projects you were hired for, then translating that into a solution that will serve many in a leveraged way, and finally creating a sales page and inviting your potential and current clients to benefit from it.
Let me know in the comments what questions come up for you when you read this post and also share with me where in the passive income journey you are in right now.
Peace,
Sophia

Related:
073: Sell your course before creating it:
www.sophiaojha.com/blog/073-sell-your-course-before-creating-it
067: Three things you should know about doing a live workshop series
www.sophiaojha.com/blog/067-three-things-about-live-workshops
053: How to build a landing page on Squarespace for a "survey"
www.sophiaojha.com/blog/053-landing-page-on-squarespace
052: Do this One thing to get to know the real needs of your audience
www.sophiaojha.com/blog/052-ask-the-audience
031: How to Create an Evergreen Sales Funnel Using Visual Automation in ConvertKit
www.sophiaojha.com/blog/031-how-to-create-an-evergreen-sales-funnel-using-visual-automation-in-convertkit
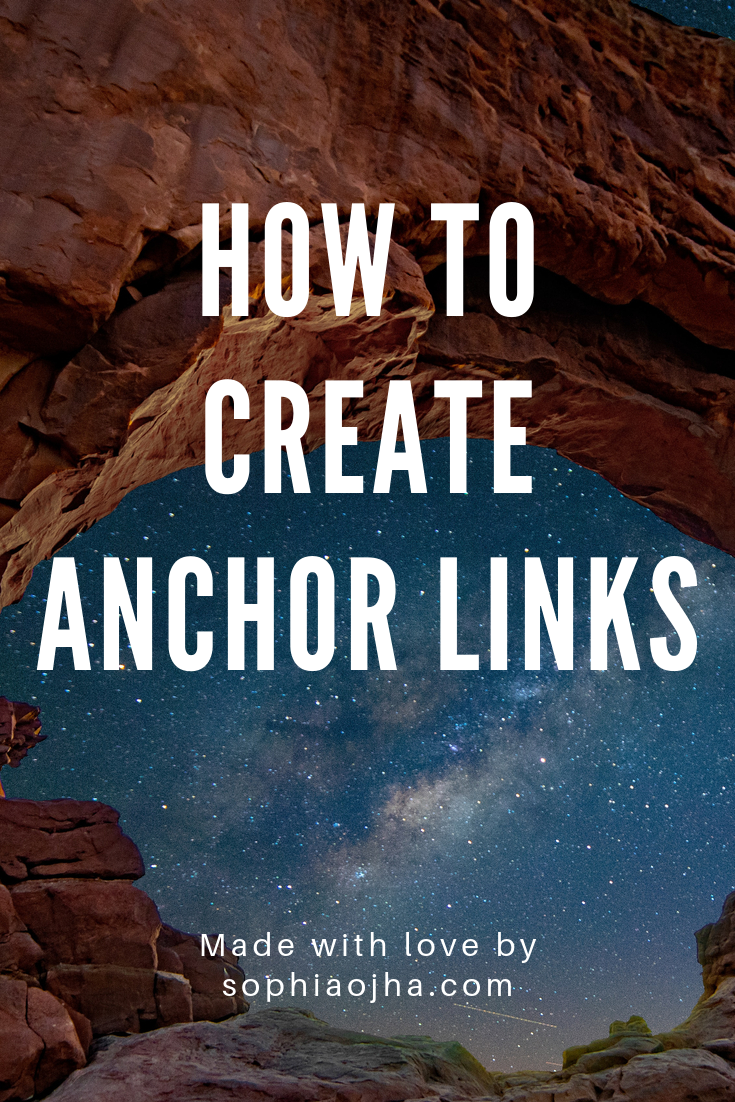
078: How to add anchor links within blog posts
If you have a long-from blog posts that cover a lot of content, then consider using anchor links to break up the flow of the content. Anchor links in blog posts allow you to have a list of quick links at the start of the article so the reader can jump to the relevant section instead of having to scroll.
If you have a long-from blog posts that cover a lot of content, then consider using anchor links to break up the flow of the content. Anchor links in blog posts allow you to have a list of quick links at the start of the article so the reader can jump to the relevant section instead of having to scroll. I have done this in Blog Post #070 and you can click the link below to see the use of anchor links live in action:
https://www.sophiaojha.com/blog/070-3-easy-ways-to-edit-your-blog
In this quick video, I show you exactly how to set up the anchor links so that you improve the user-experience of your long-form blog posts. Check it out!
Related:
Want to know how to add anchor links on a page on your site instead? Go here:
https://www.sophiaojha.com/blog/077-anchor-links
Watch the video below:
Let me know what you think in the comments and drop in a link to how you have used anchor links! I’d love to see!
077: How to present a collection of pages using anchor links
Anchor links are a great way to showcase a collection of pages. Use it for your Services page, 3 Best Blogs, or a collection of your best Resources.
Anchor links are a great way to showcase a collection of pages. Use it for your services page, 3 best blogs, or a collection of your best resources. I show you how to create them in this video tutorial. Here I am presenting three workshops and you can see how anchor links help the visitor to jump to the relevant section on the page.
—
My biggest lesson ⎯ Use anchor links to create new page layouts
In summary: Use anchor links whenever you want to present a collection of content in an easy to navigate format for your website visitor.
Your Turn:
Show me your page layouts in which you’ve used anchor links. Let’s inspire each other with new page designs. Chime in! I’d love to hear from you!
~ Sophia

042: These 6 tweaks I made to my Squarespace website helped conversions
See the 6 tweaks that helped me make my website conversion-friendly. Watch the video for case studies and examples to help you get ideas and inspirations.
These 6 tweaks I made to my Squarespace website helped conversions
Over the last few years, I've studied and collected tons of information on how to make a website conversion-friendly. In other words, conversion-friendly is all about preparing your website so that visitors turn into subscribers.
It's not just about putting up a lead-magnet or sign up to my newsletter form, which of course are important. But you need to pave the way with these other strategies so the reader will want to subscribe.
Now, knowing all the info is one thing. But implementing is another. So today, I want to share with you the 6 changes I actually implemented on my Squarespace Website that helped me to improve my website conversions.
I invite you to assess your own site and see if you need to make any of these changes to your site to improve your website conversions.
Watch the video to see examples and
case studies from other sites for all 6 tweaks
So here are those six tweaks I made on my website:
1. I changed all my links to be of the same color:
This is something I learnt a couple years ago from Derek Halpern of Social Triggers. It made sense to me. When we have different link colors, the experience for the reader is discord and disharmony. Our eyes are trained to see patterns.
So bank on that behavioral fact and make all your links to have the same color. This unified look will give cohesion and clarity to your site and trains the eye to easily know what is "clickable".
Pro-tip: Choose a color for your links that stands out from the rest of the font colors on your site.
Pro-tip: Apply this rule to all buttons and anything clickable.
Pro-tip: Carry over this rule into your emails where buttons and links are of the same color as those on your site for links.
These are examples from my blog as of June 14th, 2018:


Here you see an excerpt of my blog summary on my home page. I've got the clickable headline in mango-yellow. And the Read More link is also in mango-yellow.
Here you see my Blog sidebar. Notice that all the category links are in a unified color.
Also my invite to my weekly newsletter is wrapped in a mango-yellow circle.
Here is a screenshot of my Live Workshops page. Notice the button is in mango-yellow.
On my work with page, I have yet another button. You can see that "Start this package" button is in a button that has a mango-yellow border.

Same thing I repeated with the purchase buttons on my "Create a Website that Converts" Live Workshop page. You see the repetitive mango-yellow and they are all clickable.

Here's a screenshot of my top navigation. You can see that upon hovering over each option, the link color turns mango-yellow. And of course, the text logo on the upper-left and the button on the upper-right are both clickable and have mango-yellow to create a harmonious user-experience.
2. I reduced my top navigation to four tabs
I streamlined my top navigation with only four page choices: Portfolio, Blog, Work With Me and Live Workshops. All of them have interlaced purposes. I want my Portfolio to show that I can build Squarespace Websites so that folks will want to Work with Me. My Blog also helps to build credibility and demonstrate my expertise which leads folks to either work with me or join my Live Workshops. I am working on integrating my Portfolio within my Work with Me page so it will go down to three and make room for a value-giving lead magnet instead.
Below you can see my top navigation has only four options:

Right now, my footer navigation is a bit overcrowded. But I am on my way to fixing it and want to streamline it as well.
You will also see that there are no drop-downs. I find them a bit cumbersome and sometimes even counter-productive when they end up overlapping on top of other menu items.
Having fewer options to click makes it easier to for the viewer to make choices and move forward with interacting with your site. You can always put more details nested within the umbrella pages.
If you do need to have very distinct pages all at once in a at - glance view, have them in the footer in a neat and logical list. I encourage you to find more cleaner and streamlined ways to organize your pages. In the video I show some good example of orderly footers. I am taking my own advice and working on streamlining my footer navigation is on my task list!
3. I have a logical CTA on each page (as much as possible)
I made an effort to have calls to action (CTA) embedded on each page as much as possible. Each page of your site needs to graciously move the conversation forward. For example, once people have read your About page, what should they do next? After they have read your blog article, what's the next step. Ask this question when crafting each page of your site and you will create a natural flow to keep your visitor moving forward. Call-to-actions can be anything that makes the person click and helps them move forward in exploring your content and connecting with you. Some examples of CTA: Read more, Hire me, Check out the blog, Sign up to the newsletter.
My next goal is to bring a CTA above the fold. Above the fold essentially means, to the top part of your page on the screen, before you need to scroll down. I still have this to do on most of my pages. It is a work in progress - the work is always getting more and more refined over time!
4. I have a blog that is filled with useful content
This is really key to making your website conversion-friendly. Why? Because a blog helps you stand out, shows that you can help people solve a particular problem and builds trust. Whether its written content, audio podcast, video tutorial or a combination of it all, a blog is one of the most important things on your website. It makes people come back to your site repeatedly.
Your blog content sets you apart as an expert, an authority, as someone who knows what they are talking about. It is your digital content that serves as the window to your business. Create content. Create consistent content. That's key. Sean McCabe at the 2017 Craft and Commerce Conference said that as soon as we started writing daily, the income in his business sky rocketed. Take a look at this photo below of one of his slides where he points out how his revenue increased when he began writing daily. Here are some meaningful things I learnt from Sean McCabe in my blog post No. 025.

Consistent can mean different things to different people. Pick a frequency and keep at it. Weekly, twice a month or monthly - whatever it is Pick it and stick to it.
For over a year, I blogged weekly but burnt out and had a gap for a while. This didn't help my business.
Now I am back, with a stronger and better approach to creating content and so far I have been doing well with a new weekly publication - every Thursdays!
Want to receive my Thursday emails? You can sign up here.
So, yes, creating content is muy importante. Please consider putting up a blog if you don't have already and start publishing content. It would be a wise move on your part.
5. I personalized my about page:
I still come across sites where I see nothing about the creator or the human behind the website. People buy from people. We like to know who we are dealing with. People are always eager to find out who is this person behind this organization or behind this site. Add an about page.
And then don't be afraid to show your personal side. At least add one photo - and choose a photo that reflects the mood you want to project to your audience.
Ex. I chose a photo of me with a kitty - why? for two reasons. I love cats and that’s a huge part of my life - I have seven cats and my dream is to fund animal shelters in places that don’t have any. And two, my brand is about friendly expertise that I share with the main purpose of helping my readers.
That’s why the mango-yellow is a big part of my site branding. I did not choose a photo of me in a suit sitting behind a desk working on my computer. That’s not the image I want to give.
Also, you’ll see lots of trees and nature and landscape on my site - that’s part of a very intentional choice. I love nature but do spend 8 to 10 hours behind the screen. And so do my readers and my clients. I want to give them a chance to experience nature at least visually through my site. Nature also represents wisdom and quiet strength. And that is what I want to bring to my clients under all of the tech and the strategy, my goals is that with all that help people will be able to have a peaceful, thriving life where they act from compassion and wisdom. Not very common for a business that is so tech oriented but that’s a big part of me.
6. I added a location
This may not seem important but it is important. Every website should state where it is located. This helps people have an anchor in their minds. I often like to know where my clients are based or where they are if they are traveling.
My mind makes an invisible connection with that place and I know that’s where my client is. Otherwise people are just floating in the vast internet space and that is very unnerving for us earth-bound creatures. Don’t you think so?
Adding a location also adds character and personality to the site. If you are a business based in London or one that's based in Perth or one that is based in the deep forests of the Appalachain Range in North Carolina (that's me), you will each have a different vibe. It's important to bring that flavor.
I choose to not have cityscapes and gorgeous street art graffiti in my photo choices on my site because I live inside a national forest. I have wall-to-wall green, lush trees to look at - so I feel my site should emanate that vibe.
There you go. Now it's your turn!
These are just a few of the tweaks that I made on my website that has made it more conversion-friendly. My clients have found me because of the blogs that I have written and videos on YouTube that helped them solve a problem. And people are registering for my workshops. This is evidence to me that things are on the right track.
If you've got all these tweaks down and your site is working well for you, congrats.
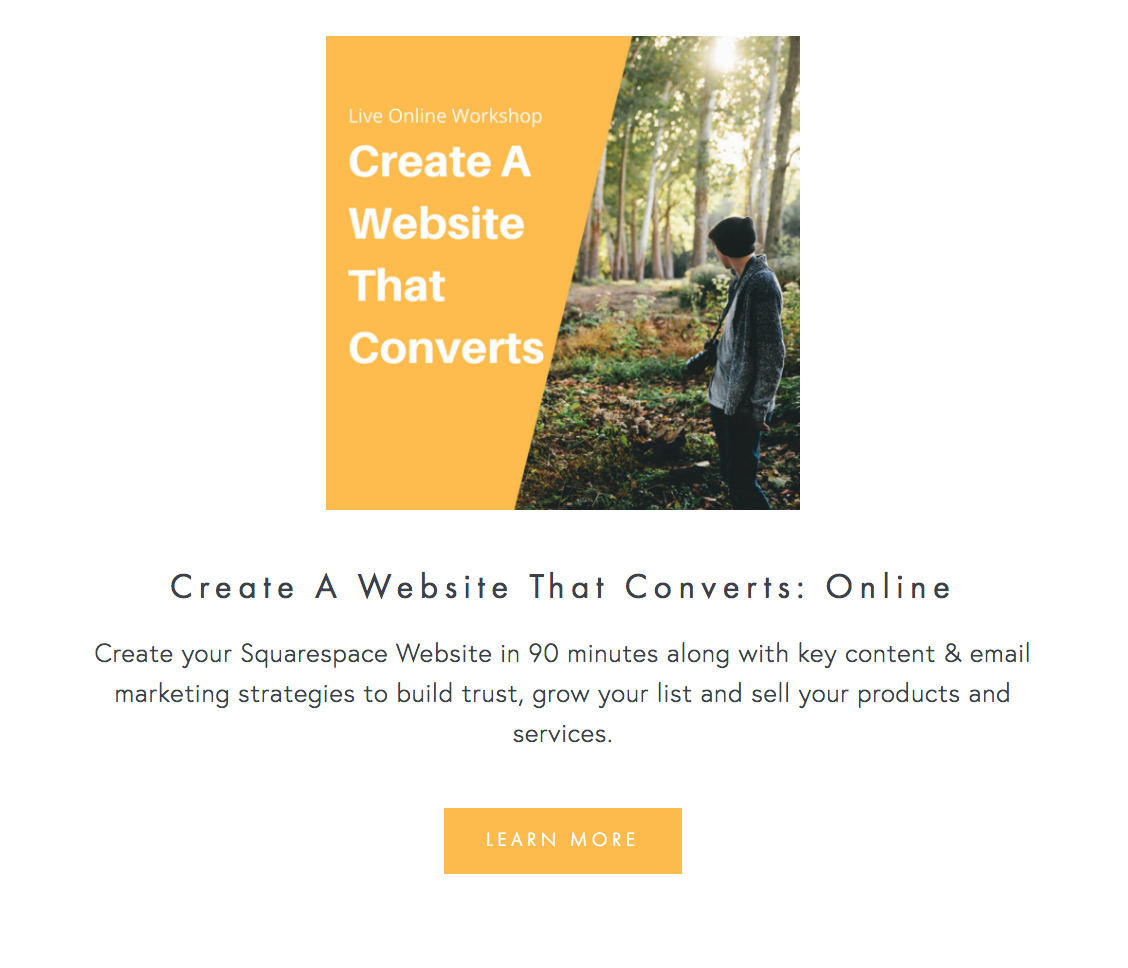
But if not, and you want to transform your website into one that converts,
And learn those tips and strategies in an afternoon, then you are invited to my live workshop.
I'm hosting a live workshop, "Create a Website that Converts".
Get all the dates, details and registration info here.
Thanks for being here,
Sophia
Related Blog Posts:


029: How to remove the announcement bar just from one page on Squarespace?
This one is short and sweet. On your Squarespace site, you are able to add an announcement bar on the very top. This is really nice because you can draw attention of the visitor to something that is current or most important. But how do you remove it from displaying on just a single page of your site? I show you how in this mini-video tutorial.
Hello my friend,
This one is short and sweet. On your Squarespace site, you are able to add an announcement bar on the very top. This is really nice because you can draw attention of the visitor to something that is current or most important.
It looks like this:
But what if you'd like to remove it?
In my case, the announcement bar draws attention to my live trainings. But once I get to that page (by clicking on the link in the announcement bar), I don't need that bar there.
So how do you remove it from just that page?
All you have to do is:
1. go to that particular page in your dashboard and click on settings
2. Click Advanced Settings
3. add this piece of code in the Advanced Settings:
.sqs-announcement-bar { display: none; }
4. Hit Save, Refresh the page and see the results! Done!

Watch the video below for a quick demonstration:
Love it when things are quick and simple, right? Me too! :)
Let me know if this worked for you in the comments!
Peace,
Sophia