
Simplify Your Life &
Align with Your True North
Choose Your Path
-

Simplify
-

Introspect
-

Quotes
-

Inner-Voice
-

One-Person Business
-

Financial Freedom
101: Learn Squarespace CSS Tricks From These Six Experts
Now, it’s a given that you can build a decent website using the pre-designed layouts and templates from Squarespace. But from time to time, you will want to add a design element to your Squarespace Website that will requires a some CSS code. I’m self-taught when it comes to CSS and I have many of my talented colleagues to thank for showing me their tips and tricks when it comes to adding that special look to any Squarespace website. And I’d today, I’d like to share 5 of them with you so that you can tap into the wealth of resources they have created. Let’s get started.
Now, it’s a given that you can build a decent website using the pre-designed layouts and templates from Squarespace. But from time to time, you will want to add a design element to your Squarespace Website that will requires a some CSS code.
I’m self-taught when it comes to CSS and I have many of my talented colleagues to thank for showing me their tips and tricks when it comes to adding that special look to any Squarespace website.
And today, I’d like to share 6 of them with you so that you can tap into the wealth of resources they have created. Let’s get started.
And oh, none of them have paid me to promote them. I am genuinely grateful for these experts for sharing and teaching what they know.

Uplevel Your Squarespace Website with CSS
Click the image below to watch video:
Here are six of the CSS experts that have paved the way for my own learning.
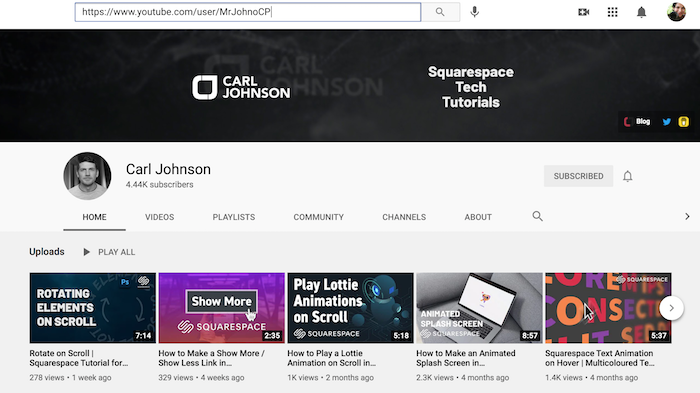
1. Carl Johnson
Not only do I love his accent, Carl teaches CSS specifically for the Squarespace platform and his YouTube channel is fantastic. Check it out here: https://www.youtube.com/c/MrJohnoCP
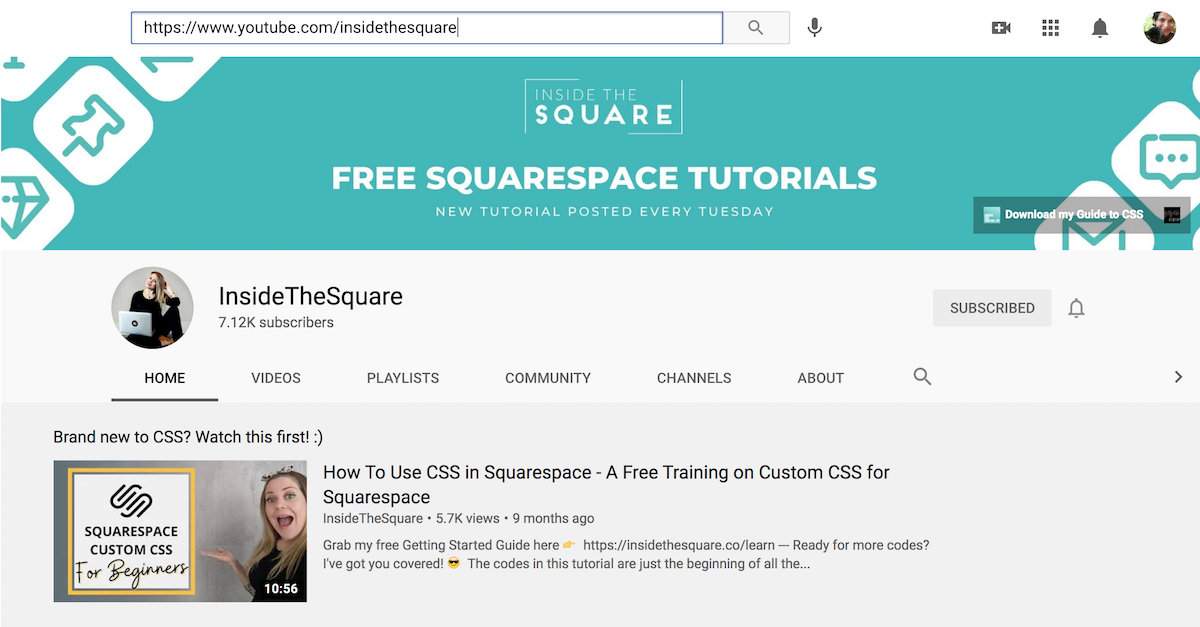
2. Inside the Square with Becca Harpain
You may have already seen Becca’s videos on using CSS for Squarespace. I’ve found them easy to follow and very helpful. Check her YouTube channel here: https://www.youtube.com/c/InsideTheSquare
3. Beatriz Caraballo
Beatriz’s videos are very helpful as well and her blogs have very in-depth screenshots and step-by-step descriptions of how to use code. Check her YouTube channel here: https://www.youtube.com/channel/UCwDJktnCURFGiJdINrDwRcg and her website here: https://beatrizcaraballo.com/

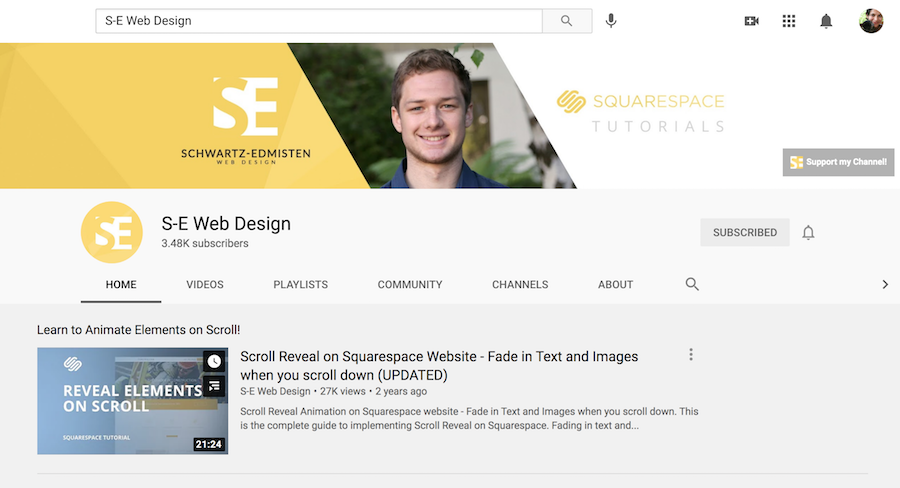
4. Chris Schwartz-Edmisten
Chris not only teaches CSS tips and tricks but also has many videos on the many features of Squarespace. Check his YouTube channel here: https://www.youtube.com/c/SEWebDesign
5. Will Myers
Will creates fun and engaging videos all about Squarespace. I found him when looking for how to build a Mega Menu on Squarespace. Check out his YouTube channel here: https://www.youtube.com/channel/UC2pYFwXEwVolfeDumbNAUyQ

6. Rebecca Grace Designs
Rebecca’s channel is very helpful and not just for CSS. Check out here videos on all things Squarespace as well as about running a web design business. Her YouTube channel is: https://www.youtube.com/c/RebeccaGraceDesigns

Let me know in the comments if you have checked these experts out. And also let me know who else you would recommend so we can continue the trajectory of learning and growing together.
To your success,
Sophia

095: New Squarespace Circle Webinar
Needless to say, I am super excited to be leading a live webinar for my fellow web designers and creatives at Squarespace Circle and I’ll be talking about creating a client onboarding process that wows and helps your client deliver the content you need before you start project. Happening on Aug 17th at 11 am ET. Sign up below.
Needless to say, I am super excited to be leading a live webinar for my fellow web designers and creatives at Squarespace Circle and I’ll be talking about creating a client onboarding process that wows and helps your client deliver the content you need before you start project.
You are Invited to Live Webinar:
The Complete Client Onboarding Process
Event took place on Aug 17th 11 AM ET
(Recording available when you sing up)
Click the image below to watch video:

What I’ll Cover
In this training, I will share the essential emails I send to clients and my complete onboarding workflow. I'll break down how to give a high-touch professional experience to your clients while making sure you get all the content you need before your web design project begins.
Update: You can sign up to see a recording of the webinar.
To your success,
Sophia
094: How to Connect Squarespace Shop with ConvertKit
Squarespace is a platform that speaks with other apps and systems that you may be using to run your online business. Such integrations often need an API key that’s generated in your Squarespace dashboard. Let me show you where you can create it.
Forget Zapier. There’s a direct integration between Squarespace Commerce and ConvertKit!
In this video, I will show you how to integrate your Squarespace E-Commerce or Shop with ConvertKit. So all your transactions and client email info are fed into your ConvertKit account.
I recently was hired by my client afrosexology.com to migrate their email marketing system into ConvertKit and part of the migration project was to also make this integration. This video is thanks to the. Check them out here if you like. So let’s jump right in.
Video: How to Connect Squarespace Shop with ConvertKit
Watch this quick video for a step-by-step guide.
Click the image below to watch video:
Integrate Squarespace Commerce with ConvertKit
Step 1: Generate an API Key from inside Squarespace
Jump into the backend of your Squarespace website and go into:
i. Settings > Advanced > Developer API Keys
This will bring you to the right spot.
ii. Next, Click the Generate Key
This will open up a box.
iii. Next, Add in a Name for your Key
Often you will be needing several keys when connecting different apps. So name the key appropriately. In this case I am calling it ConvertKit.
iv. Alright, Next Click on Orders
Make sure you click on Read and Write.
v. Then Click Generate Key
You can now click the button that says “Copy Key”
Step 2: Now go into your ConvertKit dashboard
i.Click on Automations which is the second tab on the top left navigation > then integrations which is on the top all the way on the right of the screen.
ii. Then look for Squarespace which is likely to be squarely in the center of your screen. Click on it.
iii.Then paste the API Key that you had just copied and click Next.
iv. Then click “Sync Squarespace Orders to ConvertKit” and click Next.
v. That’s it. You see the green check mark next to the Squarespace logo which means the connection has been made. The two should be communicating now.
Step 3: Testing
I always like to do tests when I set up things so I can be confident that what I intended is actually happening on the platform. My Web designers who are watching this, I suggest you take a screen cast of you doing the test, that way you can show your clients that things are working and help them feel confident too.
So to test the integration of the e-shop and ConvertKit. I will make a test purchase. I will simply create a temporary discount code to do this. If you want to know how to create a discount code, watch the next video and blog No.95. I will skip it here to keep the videos short but you can pause this video, watch video 095 and then come back if you like.
Next I will open up the website on incognito browser on my Chrome. And jump into the shop. I will purchase this workbook to test the integration. I’ll add in my details. The discount automatically is applied to this item which I see here. And yes, I now have the workbook here.
Next, I want to see if this transaction is correctly showing up inside ConvertKit. But don’t do what I did which is to immediately go into ConvertKit, because it takes a couple of moments for the two systems to communicate, especially the first time. So go to the window watch the sky, give your eyes a break or get some water and then come back. When I went right away I was refreshing and clicking here and there but I didn’t see the transaction show up. I just needed to give in a few seconds.
And then, in ConvertKit, under the subscribers tab, you will see in the lower right corner that all the products offered by Afrosexology have showed up correctly. So ConvertKit is pulling all the past product sale data as well which is great.
Now, I will search for the email address I used to make the test purchase. You can do this while still in the Subscriber Tab on the middle right section of the page. It looks like this.
And yes, the email shows up which is evidence that the integration worked. And to further confirm, I will drop into the Purchases tab, and yes, I see the transaction, the product, the date. And by clicking on the drop down arrow below the date, I can see more details such as the price and the discount amount.
So that’s how quickly and easily you can make the integration. In Blog 096, I will show you how to integrate your ConvertKit account to the shop on your new website. This is useful if you already have the integration on your current site but are moving to a brand new website and need to connect the new website to your existing ConvertKit account. Check out Blog 096.
Invitation to Squarespace Web Designers + Circle Members
Also, if you are a Squarespace Web Designer and part of Squarespace Circle, I am doing a webinar on the Complete Client Onboarding Process on August 17th. Sign up to my free Newsletter The Abundant Creative and I will be sharing their sign up page on the 12th.
Well, I hope you found this video helpful. Thank you for watching and I wish you a peaceful and harmonious day. Bye for now!
To your success,
Sophia
093: How to Generate An API Key in Squarespace
Squarespace is a platform that speaks with other apps and systems that you may be using to run your online business. Such integrations often need an API key that’s generated in your Squarespace dashboard. Let me show you where you can create it.
Squarespace is a platform that speaks with other apps and systems that you may be using to run your online business. Such integrations often need an API key that’s generated in your Squarespace dashboard. Let me show you where you can create it.
Note: This video was made thanks to my client Afrosexology.com for whom I recently completed a ConvertKit Migration project. Check them out here.
Video: How to Generate An API Key in Squarespace
Watch this quick video for a step-by-step guide on how to generate an API Key.
Click the image below to watch video:
Integrate Squarespace with Other Apps using the API Key
Follow these steps:
i. Settings > Advanced > Developer API Keys
This will bring you to the right spot.
ii. Next, Click the Generate Key
This will open up a box.
iii. Next, Add in a Name for your Key
Often you will be needing several keys when connecting different apps. So name the key appropriately. In this case I am calling it ConvertKit as I was doing an integration for my client Afrosexology’s who wanted their e-shop transactions feeding into their email marketing platform. If you want to know how to do such an integration, watch next video and blog No. 94. Also, Sign up to my free Abundant Creative Newsletter, that way you will get an email when I release a new video or blog article or have a new offer. Last year, I gave away 5 free custom designed websites to lucky newsletter subscribers and I do things like that from time to time. So do sign up at the link on the screen or in the description.
iv. Alright, Next Click on Orders
Make sure you click on Read and Write.
v. Then Click Generate Key
You can now click the button that says “Copy Key” and then go into whichever app you are working with.
That’s it.
I hope you found this video helpful. Thank you for watching and I wish you a peaceful and harmonious day. Bye for now!
To your success,
Sophia

092: 5 Steps to Easily Set Up Member Areas
Member Areas is a new feature rolled out by Squarespace that allows you to host an online course, offer a membership or other content behind a paywall or offer free curated content for specific users, all on your website.
In Blog + Video No. 091, I walked you through the steps for setting up a login page so that your students can sign into your program. In this video, I want to show you the first four of the five steps you need to make your online course/membership content available for purchase.
As you may know, Member Areas is a new feature rolled out by Squarespace that allows you to host an online course, offer a membership or other content behind a paywall, all on your current Squarespace website.
In Blog + Video No. 091, I walked you through the steps for setting up a login page so that your students can sign into your program. But before you can do that, you need five things ready to go. In this video, I will walk you through these five steps.
These five things are:
1. You need to enable Member areas
2. You need to purchase a plan - meaning subscribe to Member Areas.
3. You need to connect your payment processor - Stripe/Paypal or both
4. You need to create your member area - meaning name your member area and set up your member fee - what your students or members will pay.
5. Then build out the content for at least the first page of your member areas such as a welcome page.

Host & Sell Your Courses, Memberships or Online Workshops through Squarespace Member Areas
Click the image below to watch video:

Let’s get started.
Step 1. Enable Member Areas
First, you will need to enable member areas, in other words activate it in your account. To do that, go into the backend of your website and head over to Settings. Then click on Member Areas and simply toggle it on.

Step 2. Purchase a Plan for Member Areas (Subscribe to Member Areas)
You can purchase a plan for Member Areas from your within your Pages Panel. So head over to Pages and then scroll down to Member Areas and click the blue arrow. It will tell you that it's an add-on feature.
So click the Select Plan button and choose from these three options. You have the break down here so you can make the best selection but a quick summary: if you want simply a single member area go for the Starter plan, if you want more than one and up to three go for Core and if you want 10 or so go for the Pro Plan.
Also notice the difference in the transaction fees at each plan level. After you have a plan that you like click select and purchase.

Step 3. Connect to a Payment Processor (Stripe or PayPal or both)
In your dashboard, head over to Settings and then Member Areas and then click Payments. Here you have the option to set up Stripe and PayPal. You can do both. Click on the Stripe Connect button and it will open up a window. If you already have a Stripe account then you can simply sign in and if you don't have a Stripe account at all, this is where you can set it all up. You can do the same to connect your PayPal. Simply click Connect and follow the instructions.

Step 4. Create a Member Area (Give A Name & Price)
Here you will select a name and set up the pricing. We are now in the Pages Panel. Come down to the Member Area section, click on the plus sign and then Setup Member Area. Here you can add a name for your online course or membership site. In my case, it is Squarespace Fundamentals On Demand Workshop.
You also have the option to set a recurring fee which is appropriate for a membership program or a one time fee or even free. In this case, I'm going to select One Time and add in the cost of the on-demand workshop. It will still say membership fee but we know it's just a one time fee. That's it. Now you're ready to set up the content.

Step 5. Build the Content Inside the Member Area
Creating content in your Member Area follows the same rules that you use for setting up other pages on your website. Simply click the plus sign here to add a new page and build your content area. You can select any of these layouts and add video, text content, audio files, PDFs and anything else that would help your students.

And that's it. These are the five steps that you need to have ready before we can go on and create a login page where your students can actually purchase your program and log into your Member Areas to access the content that you have created. Check out Blog No. 91 to see how you can do that.
091: How to Set Up Login Page for Squarespace Member Areas
There’s a lot to cover about Member Areas but for today, I want to address only one thing and that is how do enable a login feature so that your students can sign into your program.
You may have heard about a new feature that Squarespace recently rolled out called Member areas. You may have seen it show up in your Pages panel. And I am so excited that Squarespace released it because all this time I have been teaching the students of my online course, Host Your Course, how to use Squarespace for hosting their online programs or memberships. And now Squarespace has just made the whole thing streamlined, more professional, simplified and just simply beautiful.
Now there’s a lot to cover about Member Areas but for today, I want to address only one thing and that is how do enable a login feature so that your students can sign into your program.
What you need to know is that before you can set that up, you need to have these five things in place.
1. You need to enable Member areas
2. You need to purchase a plan - meaning subscribe to Member Areas.
3. You need to connect your payment processor - Stripe/Paypal or both
4. You need to create your member area - meaning name your member area and set up your member fee - what your students or members will pay.
5. Then build out the content for at least the first page of your member areas such as a welcome page.

And I say at least the first page because you don’t need to have all the content created in order to enable students to enroll. This is especially helpful if you are dripping content week after week. If you want to give access to content to your students week by week, then they can already purchase and start going through your welcome page content and you can then make the content available as it becomes ready.
But now let’s take the next step which is setting up a way for your students to log in to your program from your website.
Alright, so let’s jump in.
Create a Login Page For Your Squarespace Member Areas
Click the image below to watch video:

Activate the Login Link in Top Navigation
The first thing I want to show you is how to activate the login link on the top navigation of your website. So head over to the back end of your website. And click into Edit Site Header. And then jump into Elements. You will see four option now and you wanna go to Account and activate it like so. Notice how the Login link instantly appears in the right corner of the top navigation. I am going to click save. And look at my site as a site visitor will see it using incognito. And I can see the login link is activated.
When I click on it a box opens up. And there are two things that a student can do here. 1. they can add in their email and password to login. and 2. They can create their account which will be important to do for new students.
Better Clarity For Enrolling New Students
When I am enrolling new students in my program, this box is not very clear and helpful as to what you need to do as a new student. So I want to make it super clear for my students. And so what I am going to instead is to create a special login page where I can have better instructions to my students. I will show you that in just a second. But I am glad I activated the login link because I can now copy the url of this box and use it on my special login page. This will be used by returning students specifically.
Creating a Special Login Page
So now I am creating a special login page. I’st essentially millionairewebdesigner.com/login. First, I will add a button that says Student login or rather Returning Student login. And place paste the URL that I just copied from the login link. It says millionairewebdesigner.com/account/login.
So any student that is returning meaning they have already created a new account, can access the member areas by clicking here.
And then what I will do is create a way for new students to enroll. So I am going to choose a content block here that lets me add the Member Areas Sign up. This is similar to a product block if you have used that before. I will choose the Member Area (MWD - Program), and uncheck everything but the Show Join Button. I will call it “Create New Account”.
Now you can see there are two buttons but they are two different content blocks, one is a button and the other is a Member Areas Sign up content block. I can now direct my new students to go to this page so that they can create a new account, purchase and enroll into my program.
When somebody clicks the “create new account”, they can add their name, email and password and be directed to purchase and enroll into the program.
The “returning student button” allows students to login (those who have already created their accounts).
Disabling the Login Link in the Top Navigation
Now I personally don’t want the login button to show up on the top right navigation of my website. And that’s why I created a separate login page for all my students and it’s linked in the lower right corner of my footer. So I’ll just go in and disable the login link so it doesn’t show up in the top nav.
That’s really it. I like how the login page looks. It has two distinct buttons presented with crystal clear clarity so both my new and returning students know exactly how they can get into the program.
How are you using Member Areas?
I’d love to know in the comments how you are using Member Areas in your business. And if you are not, what kind of decisions you still need to make in order to make it happen. Chime in the comments and let me know!
Peace,
Sophia

090: What James Clear's Website Taught Me About Presenting Your One Thing
With the start of the new year, you may be thinking of giving your website a fresh new look. But before you scroll through new templates or change up the font or the color, I suggest you look at your website and ask yourself this question:
Is my website clearly presenting my no. 1 goal to my visitors within seconds of them arriving on the site? This single question will prove to be more effective in using your website to help realize the goals you have for your business.
Do this one thing before redesigning your website:
Figure out the No. 1 goal for your website & display it prominently on your site
Now your website can do a number of things for you. From positioning you as an expert in your field, to growing your email list to demonstrating case studies/your portfolio of work, getting new clients and selling your products. While your website can do all of these things, it needs to have one primary goal which you as the website/business owner need to be clear about. And this primary goal may change from season to season and accordingly your website needs to adapt to it - more on that in the example below.
The reason for this is that once you know the No. 1 goal of your website, all other decisions will come easily - whether it is the font and color choice, to what pages go in the footer vs top navigation, to what third party integrations you will need and so and so forth.
Let me give you an example: jamesclear.com. After reading a recommendation on the blog of my colleague, Sequoia Mulgrave I went ahead purchased the book as it is now on my reading list for 2021.
A beautiful minimalist website example that shows you how to display your primary goal prominently on your site.
Click the image below to watch video:

Let’s say you are an author who has just published a new book and want to sell more copies to the people who land on your website. You will want the new book to be front and center on your homepage, prominently displayed on your top navigation and on your about page for example. Readers of your site need to know about your book within seconds of landing on your page. An author that does this extremely well is James Clear, author of New York Times bestseller, Atomic Habits. Have a look at his site:
i. Home Page
On the Home page of JamesClear.com, the first thing you’ll notice right away is that James Clear is the author of the book Atomic Habits. The image of the book is prominent, right in the center. The position is inescapable.
Also hard to miss is the opt-in form which from a marketing-perspective seems to be the no. 1 function that I notice on all pages. From a value-perspective it’s very obvious to me that giving valuable content to the readers is the number one goal of the site.
Also notice the ample use of white space or negative space. The screen is not jam-packed with content, one of the hallmarks of minimalist design. There is lots of margin, as one would say in book design and a healthy headroom, as they say in filmmaking.
Plus notice the short sentences that take up no more than 2 lines each.
On the Home page of JamesClear.com, the first thing you see is the book Atomic Habits and an email opt-in for list-building. It’s prominent and inescapably positioned.
ii. Books Page
Now let’s look at the Books page. Not only is the book on the homepage, it also is the first link in the top navigation. When you click Books and land on the Books page, you recognize the Atomic Habits book and then you learn that there’s another one - The Clear Habits Journal. And both of these books have buttons with calls to action where the visitor is invited to go deeper and learn more.
And that is all on this page - more is not really needed.
The Books page is beautifully laid out with the Atomic Habits and The Clear Habit Journal presented with a CTA (Call to Action button) to learn more.
iii. About Page
Now let’s go on to the About page. I really like the content here above the fold. Notice that instead of diving into a long form bio, what you see is a short bio which does two things:
1. it lets you know that James Clear is the author of Atomic Habits and
2. it invites you to the newsletter signup
Then on the right you see a quick snapshot of some of the things he wants you to know about him. A new piece of info here I see is that he is the host of The James Clear Show - so I am intrigued and want to know more.
And then you learn more about him throughout the page and at the bottom is again the opt-in form.
About page also shows how the main goal of the site to position authorship of Atomic Habits is visible along with the invitation to sign up to the newsletter.
The opt-in form is on the bottom of the About page and displayed in a way that the visitor will not miss it.
iv. The Footer
One final thing I want to point out is about the footer. It’s very succinct and neatly presented. Plus, notice that we only see two social media links which I take as encouragement to pick one or two social media platforms than trying to be on multiple ones.
The footer is crisp and to the point.
If you looked at the other pages like Articles and Events, you will see a similar sense of coherence and simplicity which gives a clean look and has a calming effect. There are tons of good design decisions on this site and I absolutely love it!
So I hope this website example shows you visually how you can 1. get clear about your number one goal for your website. 2. prominently display it on your website.
I am so inspired by this website that I will be incorporating the design insights into my very own website refresh which I am embarking on this year. Stay tuned for that in the following months!
Now, it’s your turn. Have you run into websites that are exemplary in your view? Share them in the comments and let me know what you think they do best and what can other website owners learn from it.
To your success,
Sophia

085: How to Connect A Parked Domain to Your Squarespace Website
Did you purchase a domain name on Squarespace just so that you could secure it now and use it later when you are ready for a new website? Or you have a website already with a it’s own domain but now you want to direct to it a second domain that you had previously purchased on Squarespace?
In either case, if you have a “parked” domain name, a domain name sitting in your account but not being used anywhere, and want to connect it to a new or existing website, then this blog + step by step video will help you get that done.
Click to Watch Video:


To connect a domain you’ve already purchased, the first thing you might do is go into Settings and Domain and click on “Use a Domain I own”. You might then type in your domain name and click continue. Then you realize, “huh, what’s going on? How do I connect it. All I see are these instructions but now button to click.”
But because you now are watching this video, you will know that you don’t start at the website that you want the domain to go to. Rather you start with the domain that you’ve already purchased with Squarespace.
Step 1 | Go to Your Parked Domain in Your Squarespace Dashboard
So you go to your Home Panel, then click on your avatar on the very bottom and go to your Squarespace dashboard. This is where your website and your domains can be accessed from. Now you see on the upper left corner of the screen, you see the tab called Domains. Click into it and you should see your parked domain.
In my case it’s this domain: millionairewebdesigner.com which is a training program for new Squarespace Web Designers (Update 2023 - this program has been retired. Checkout the latest courses and offerings in the top navigation or drop me a line). Now you see the three dots on the very right of your domain name. Click into it and from the drop-down, select “Manage Domain Settings”. You should then see something like this. Again, this is for a domain name you’ve already purchased from Squarespace and it was just parked until you are ready to use it.
Now I see here that the there is a red line next to my domain and it’s tell me that email verification is required. So I know that’s something I will need to take care of and later I will show how to do that. But first I click into it and then scroll down to click on “Move Domain to Another Site”.
Step 2 | Select the Squarespace Site that this Domain Should Connect to
What you will see next all your Squarespace Sites if you have more than one. Now what is left to do is select the site where you want your domain name to connect with. Next, you will see a screen like this one. Where it will ask you to confirm that you want to move your domain to the Squarespace site you just selected. You can double check that it’s the right one by looking at the Name of the Site and the internal url of that site. Next click confirm.
You will see this notification that your domain has been moved.
Step 3 | Make It A Primary Domain
Next, click into the domain name here and select “make primary domain”. You wouldn’t do this if you have another domain as a primary domain obviously. But in my case this is the only domain connected to my site and I want to make it primary - the main domain name for my site. And you can also check the Lock Domain circle here so this domain cannot be transferred unless you want that in the future and then you can uncheck it.
If you want to look at the Advanced Setting, you can click here but you don’t have to do anything here. And if you want to look at the Registration Information to make sure everything looks correct, you can do that as well.
Step 4 | Verify Your Email
And finally, I see that there’s a red line next to the domain and it is informing me that an email verification is required. So just click into that now. And click resend verification email. I then go to my email and see this message has come in. All I need to do is click “Verify Now”. And return to account dashboard.
Now I am quickly going into incognito to check if the domain is loading correctly. And yes, it does. As soon as I purchase a plan and publish the site, it will no longer say Private Site. And that all you’ve got to do.
I hope this was helpful and easy to follow!
You have a dream to build your web design business. You can make it happen.
Peace,
Sophia

083: 6 Ways to Save Time in Your Business with Squarespace Scheduling
6 Ways to Save Time in Your Business with Squarespace Scheduling
Workflows. Processes. Systems.
Making the most of these will surely help you save time and streamline your business. But what if you can use a tool that not only saves you time but also opens up a streamlined way to generate new revenue in your business?
Enter Squarespace Scheduling.
Workflows. Processes. Systems.
Making the most of these will surely help you save time and streamline your business. But what if you can use a tool that not only saves you time but also opens up a streamlined way to generate new revenue in your business?
Enter Squarespace Scheduling.
As you may know Squarespace Scheduling is an app that’s integrated with Squarespace and I want to show you a few ways you can optimize it for your business. Those of you who are using Acuity Scheduling, this applies to you as well.
1. Book Complimentary Client Acquisition / Consultation Calls
After a potential client fills out an inquiry form to work with me, I invite them to book a complimentary consultation call. I have my availability set up there beforehand and clients can see which times and dates work for them. If I am in talks with the client via email and we agree on a date and time, I simply send an invite to them directly from the scheduling app by simply adding in their name and email and date of appointment. Since I have zoom integrated with scheduling, I can save time by not having to create or schedule meeting in there. Plus, clients get an automated email with link, date and time all in one.
I email my clients this link: https://sophiaojha.com/book-your-consult-call
It looks like the image you see on the right.
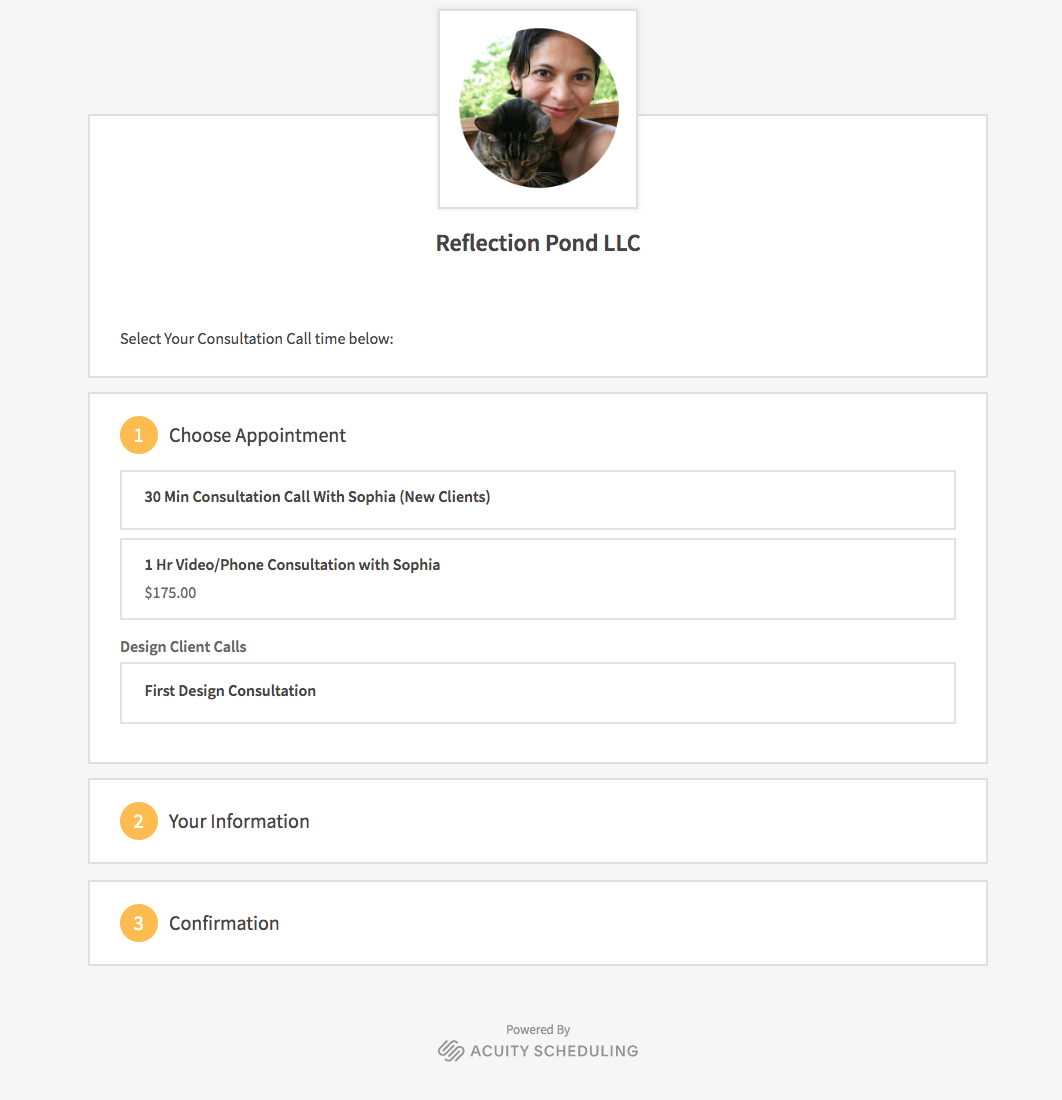
Click the image to go see the direct link live.
2. Book Paid Consultations
I don’t use this so often myself yet because clients often purchase a package with me which includes both implementation time as well as video consults and so I play it by ear and send them a zoom link for our meetings. But I have it set up just incase clients wanted to book right away. So if you wanted to block off set number of hours each week for paid consultations, this would work really well. Again it is all integrated with zoom and you preset your availability in the Scheduling calendar.
3. Book a Room or Facility
This is perfect if you have a facility where you book out different areas. I recently set up scheduling for a Canine Learning Center where their clients can book an indoor diving pool, a training course area and an outdoor pool.
Because of Covid, the owner needs time after each booking to block of half an hour for disinfecting the area and so that can be set up as well so no one can book in that half hour window right after another one client. That’s a super detailed feature that Squarespace Scheduling/Acuity provides and has come in really handy for this client.
You can go see the example live here: https://www.ink9lc.com/


4. Sell Online Zoom Yoga Sessions
Another client of mine is a yoga studio Canada who had to move everything online. Because of the nifty integration with Zoom, yoga studios can create an entire online calendar with all their varied class offerings. Yoga students can select the class they want to join, pay online and get an automated email with their unique zoom link.
The unique zoom link makes sure that only those who have paid can join the event. Plus, the Yoga Studio can creating a waiting room in their overall Zoom settings to admit only those who are on their list, for added privacy/security needs.

This is what the calendar looks like with all the weekly sessions. Check it out live: https://www.jadayoga.com/online
5. Sell Class Cards or Monthly Passes
Another feature of the Scheduling integration is that you can sell Class Cards or Monthly Passes. So for a yoga or fitness studio, this comes in handy. Let’s say the yoga studio offers Hatha Yoga, Iyengar Yoga, Vinyasa Yoga and Kundalini Yoga classes offer by different teachers. Then, they can set up a monthly pass or a weekly pass so that students can pay in advance and select from the different class offerings. Inside Scheduling, you can set up the limit based on the number of classes or the total amount. For example, you can select whether you want to have say 25 classes included in the Monthly Pass or allow students to select as many classes as they like until the value of $125. The app will keep track and once they hit the limit in the Monthly Pass, the students cannot book any more classes. You can also allow for a rollover to the next month of unused time or money. Pretty cool feature!

Check it out at: https://www.jadayoga.com/online
6. Design Consultation and Check-ins with Clients
During my two week design workflow, I meet with my clients on Zoom multiple times. We start off with a first Design Consultation on the first day and we wrap up with a Launch + Training Call on the last day. And in between these two sessions, we can meet spontaneously for quick 10 minute check-ins to review something or clarify a question. For my design clients, I simply email them a Zoom link that can be used repeatedly. But the first and the last consultations are booked via the scheduling app so that they can select a time that fits best for them.
I hope these are some good ideas for you that can help save you time, easily receive payments and streamline your workflow. Let me know if you use this already in your business and what questions you have run into.
Peace,
Sophia

082: How to Open A Free Trial on Squarespace - the Exact Steps Demo
How to Start A Free Trial On Squarespace
It’s important that you get a feel of the website building platform before you go ahead and hire a designer or start building your website yourself. So how do you do that? Start with a 14 day free trial. You won’t need a credit card. Just an email address.
So here’s how.
There are at least 5 good reasons why I think so:
It’s important that you get a feel of the website building platform before you go ahead and hire a designer or start building your website yourself. So how do you do that? Start with a 14 day free trial. You won’t need a credit card. Just an email address.
So here’s how to get started with a new a trial account.
Watch the video or read the article below it.
1| Click on my 14 Day Free Trial Link
Now, if you like my free videos and the help I am providing, you can use my affiliate link to start your account. I will get a little something only if you choose to purchase a plan but it will cost you nothing. So consider starting a trial site from here:
14 Day Free Trial for US residents:
https://www.sophiaojha.com/squarespace-us
14 Day Free Trial of International Residents (Non-US):
https://www.sophiaojha.com/squarespace-world
Alright, now you will land on the Squarespace website. Click on “Get Started”.
2 | Now you go to Templates.
You can either click on one of the categories on the left as your starting point. Or preview the templates here.
Now as of July 2020, what you see here are all Squarespace 7.1 templates. There really is no difference between these templates in terms of what they can technically do. So if you start with any of the templates here and want to create the exact about page layout that is on a particular template, you can do it on any other other 7.1 template. They are all different starting points and you can create what you want with ease. Think of templates as your easy starting points not set-in-stone endpoints.
Just a note, if you know and heard about Squarespace 7.0, the predecessor of 7.1, you can find all those templates down at the bottom of the templates page. Look for the link saying “Looking for earlier versions? Click here” or something along those lines.
Now, when I build new websites I still build them on 7.0 and so do many of my colleagues only because we have found a certain list of things that are better done in 7.0 than in 7.1. But if you are a DIY’er and want to put up a website fast, don’t worry about 7.0. You can choose a 7.1 template. If you plan to hire a designer, know that they may still want to build your site on 7.0 and that’s because they can do a lot more design wise without having to resort to coding.
Alright, so now you pick your 7.1 template or your 7.0 (earlier version) template.
And then follow the directions.
Al’right so that’s it. That’s how you open up your brand new website account on Squarespace. Go ahead and start building your first page on your Squarespace site. And again if you like the free content I am putting out here, consider opening a trial account through my affiliate links (see above). And I thank you a ton for doing so.
Bye for now and see you in the next video!
Al’right, so what’s the next step?
1 | Sign up for my workshop Squarespace Fundamentals
In this 90 minute workshop, I show you how to navigate your new Squarespace website. You will learn how to create a new page, add text and photos and understand how to use the different content blocks. This is a training of the 7.1 version of Squarespace.
See all details of the workshop here.

Get Started on Your Dream!
Start your Squarespace website and let me know how it is coming along. Drop me a line in the comments and share with me what your business is and what you want to create.
Peace,
Sophia

081: 5 Reasons Why I Love Squarespace: The Best Website Builder for Online Entrepreneurs
5 Reasons Why Squarespace Is the Best Website Builder Out There for Online Entrepreneurs
As you might have guessed, as a Web Designer who specialized on Squarespace websites, I am a big proponent of Squarespace for building your online presence. If you are an entrepreneur of any kind - whether you are an author, an artist, or a creator or if you are someone who has an idea, someone who wants to inspire and impact positive change, Squarespace is your platform - the best platform in my opinion and experience.
There are at least 5 good reasons why I think so:
As you might have guessed, as a Web Designer who specialized on Squarespace websites, I am a big proponent of Squarespace for building your online presence. If you are an entrepreneur of any kind - whether you are an author, an artist, or a creator or if you are someone who has an idea, someone who wants to inspire and impact positive change, Squarespace is your platform - the best platform in my opinion and experience.
There are at least 5 good reasons why I think so.
Watch the Video below or Read the Text

1. Squarespace was designed for DIY’ers. (Do-It-Yourself)
Squarespace was designed with you in mind - you, the creative business person and not for designers or developers. You are in the foreground of everything they do. In fact, that’s why they have over 80 professionally designed templates for a variety of niches so that you can pick any one of them and be off to the races. In fact, the newest version, Squarespace 7.1 had made it even easier for DIY’ers to build their website by making it more streamlined and user-friendly.
2. Squarespace customer service and help line
My experience of Squarespace support has been exceptional. You get a lightning fast response and the team is highly skilled not only in the topic but also in customer service skills. I’ve reached out to them and there has n’t been any issues that was not resolved. Having a professional team that is there to support you with your questions and helps you troubleshoot is priceless. Plus, there is a huge online collection of guides and video tutorials that their team has published that will be a good starting point for resolving your questions. Their knowledge base articles are detailed and highly useful and I have myself used them a lot.
3. Squarespace has a community behind it.
What do I mean by a community? There’s a community of web designers, web developers and bloggers who have put out tons of useful content on their blogs. They have created tons of video tutorials on YouTube and they have created workshops, programs and online courses. These are all packed in value and offer a huge resource at 4 am in the morning when an idea hits you and you want to run to your computer to implement it. This is important because it shows that Squarespace has already been tried and tested by thousands of users. And they are testament to the value Squarespace provides. See a directory of Squarespace Designers put together by my colleague Erin Neumann here: https://www.bealignedwebdesign.com/best-squarespace-web-designers
4. No coding, no design experience needed.
As I mentioned in point one, Squarespace is geared towards the non-designer. So you can create a highly professional website just by using their templates as a starting point. That means you do not need to know any HTML or CSS nor do you need a design-eye. Just switch out the template photos and content and you have a website that looks stunning and can get you started. This is the first barrier that is removed. Of course, you can do a lot to move away from the template and make it look more unique and fresh. But that can always be done in phase 2. It is so important to get started building your SEO (Search Engine Optimization) with your content and blogs. So my recommendation to you is just go and build your 5 most important pages and then you can tweak the design and make it all cool gradually.
5. It’s an all-in-one platform.
This is a really important point. Running an online business means there’s so much to think about and take care of. Then on top of that if you have a gazillion apps and third party integrations, then it just makes your business life very dense and complicated. And you didn’t get into business for more complication, I am guessing, but rather for optimizing your time, streamlining and powering up your life…to make an impact and grow your revenue, not to sort through hundred million different apps, right? That’s why Squarespace is really useful because you can do everything in one place: grow your email list, send out weekly newsletters, sell your services, sell your digital/physical products, demonstrate your expertise via a blog or podcast, host your online course, schedule free discovery calls with potential clients, sell paid consultations, run your website analytics, and so on and so forth. It’s all here in one place.
I run to websites on Squarespace, one you are on right now: sophiaojha.com for my web design business and the other for my site about mindfulness and meditation: reflectionpond.com which is the reason I got into online marketing and web design (I wanted to learn how to promote my meditation programs and that’s how I got into learning about web design…if you want to know more about that journey, see my Manifesto page).
Al’right, so what’s the next step?
Take it for a Test Drive.
Take it for a Test Drive. Just like you can take a car for a test drive, you can try out Squarespace for free. No credit card needed. Select your location below and start a free trial and play around with it. I will be posting more videos to show you how to create your first page on Squarespace so look out for that. Try it before you buy it!
14 Day Free Trial for US residents:
https://www.sophiaojha.com/squarespace-us
14 Day Free Trial of International Residents (Non-US):
https://www.sophiaojha.com/squarespace-world
Get Started on Your Dream!
Start your Squarespace website and let me know how it is coming along. Drop me a line in the comments and share with me what your business is and what you want to create.
Peace,
Sophia

080: How to Remove Background from Photos using Canva
In this video tutorial, I take just over 5 minutes to show you how to remove background from your photos using an app called Canva. Also get the complimentary link to try Canva Pro for 30 days!
First of all, I am so excited to restart my content creation for 2020! After the first two quarters of very busy client projects, I am back to creating new content for you.
In this video tutorial, I take just over 5 minutes to show you how to remove background from your photos using an app called Canva.
Show Me Your Work!
I love to see what you create. So drop in a link to your creation in the commetns below and let me see how you’ve used the instructions in this video,
Peace,
Sophia
078: How to add anchor links within blog posts
If you have a long-from blog posts that cover a lot of content, then consider using anchor links to break up the flow of the content. Anchor links in blog posts allow you to have a list of quick links at the start of the article so the reader can jump to the relevant section instead of having to scroll.
If you have a long-from blog posts that cover a lot of content, then consider using anchor links to break up the flow of the content. Anchor links in blog posts allow you to have a list of quick links at the start of the article so the reader can jump to the relevant section instead of having to scroll. I have done this in Blog Post #070 and you can click the link below to see the use of anchor links live in action:
https://www.sophiaojha.com/blog/070-3-easy-ways-to-edit-your-blog
In this quick video, I show you exactly how to set up the anchor links so that you improve the user-experience of your long-form blog posts. Check it out!
Related:
Want to know how to add anchor links on a page on your site instead? Go here:
https://www.sophiaojha.com/blog/077-anchor-links
Watch the video below:
Let me know what you think in the comments and drop in a link to how you have used anchor links! I’d love to see!
077: How to present a collection of pages using anchor links
Anchor links are a great way to showcase a collection of pages. Use it for your Services page, 3 Best Blogs, or a collection of your best Resources.
Anchor links are a great way to showcase a collection of pages. Use it for your services page, 3 best blogs, or a collection of your best resources. I show you how to create them in this video tutorial. Here I am presenting three workshops and you can see how anchor links help the visitor to jump to the relevant section on the page.
—
My biggest lesson ⎯ Use anchor links to create new page layouts
In summary: Use anchor links whenever you want to present a collection of content in an easy to navigate format for your website visitor.
Your Turn:
Show me your page layouts in which you’ve used anchor links. Let’s inspire each other with new page designs. Chime in! I’d love to hear from you!
~ Sophia


076: Squarespace SEO: 22 actionable things you can do (Part three)
I call this a Beginner’s Guide because these really are the first steps to get your site set-up for SEO. There’s always tons you can do but if you do these 22 things, you will be off to a great start. Some are to one-off steps, while others can become part of your SEO checklist for whenever you upload a blog or add a new page to your site.
Beginner’s Guide to Squarespace SEO (PART THREE)
Getting your website found on Google search results is one of the biggest goals of website owners. Whether your site is built on Wordpress, Shopify or Squarespace, good SEO (search engine optimization) strategies are key to your site showing up on the first page of Google for keywords specific to your business.
There is a checklist of SEO tasks that I teach my website design clients that they must go through every time they update their blog or add new pages to their website. Here are 22 of them. Why 22? Well, I was born on the 22nd but that’s not why we have 22 steps. It just happens to be 22 items for this Beginner’s Guide.
Go here for Part One (1-8)
Go here for Part Two (9-16)
You are reading Part Three (17-22)
22 SEO Tips for Optimizing Your Squarespace Website
I call this a Beginner’s Guide because these really are the first steps to get your site set-up for SEO. There’s always tons you can do but if you do these 22 things, you will be off to a great start. Some are to one-off steps, while others can become part of your SEO checklist for whenever you upload a blog or add a new page to your site.
Optimize Your Pages
18. Name Your Pages
When you create a new page in Squarespace, it automatically gets the name “New-Page”. Make it a habit to immediately name your new page according to its content. So call it “About” or “Work with me” instead of leaving it at the auto-generated name title. This is important not only for you, to know what your pages are, but also for SEO as your pages make more sense and can drive traffic according to what they are searching.
19. Have Unique Page Descriptions
Having the same page descriptions across all of your pages is not going to help you. Craft bespoke descriptions for each page adding relevant keyword descriptors without overly repeating them. You can click on the wheel icon next to each page and click over to SEO where you can now add descriptions and see how they will appear in search results.
20. Have a custom 404 Error Page
There are always broken links on websites - that’s the natural wear and tear of running a website - what is known as “link rotting”. You can fix those broken links periodically, and I have created a separate video showing you how to find and fix broken links. But when someone does click a link that is broken, a 404 Error page will show up. Make sure that you create a customized 404 Error Page that keeps the conversation going further instead of the user-experience being a dead end. I will make a video on this for you to be released on Sept 26th that will show you just how to do this.
Do this periodically
21. Remove Broken Links
As I mentioned in point # 20, cleaning up your site periodically to make sure there aren’t broken links is a good practice. Think of it your website Spring Cleaning that you really can do anytime of the year. Here’s the video showing you some free tools to do this easily.
22. Get many many backlinks from authority websites
Backlinks are still important for Google Search results. But the quality of backlinks is even more important than the quantity. If your site is linked with high authority websites that are reliable and trustworthy, then that’s a good quality backlink. Showing up in podcasts or writing guest posts or being interviewed on an authority site are some good ways to get quality backlinks.
23. Learn about new SEO requirements
Things are constantly changing and the tech world is no different. Make it your goal to keep an open mind and learn about new SEO requirements as new developments in technology take effect. One way to do that is to go to experts who make it their mission to bring these new changes to you and keep you up-to-date as a result.

My biggest lesson ⎯ Create a website with the end-user & user-experience in mind
In summary: It’s interesting, you’ll find that whenever you do something on your site to optimize SEO/Search Engine results, the same actions are also helping your visitor in some way. So you can see the direct correlation of making your site really work for your site visitor and your site getting found higher in search results. Make that your focus and you will naturally help your site get new and regular traffic.
Your Turn:
What do you think of the message in this blog article? Do you have a course created or are you planning on one? If so, let me know in the comments what your course is all about/will be about. Chime in! I’d love to hear from you!
~ Sophia

072: 12 Creative Uses of Squarespace’s Cover Pages
Owning a Squarespace Website comes with many perks. One of them is Cover Pages. These are pre-designed layouts already within your website that are easy to set up.
Use Cover Pages for a variety of purposes: announcing the launch of a new book, new product or service, as Thank you Pages, for building your email list or as a landing page for people to sign up to your online or in-person event.
Watch this video to see 12 creative uses of Cover Pages:
Your Turn:
Have you used Cover Pages on your site? If so, post a link to your cover page example. Chime in, in the comments below. I’d love to hear from you!
~ Sophia
Update: It’s October 2023 and I am revisiting some of my old posts and Cover pages are no longer a feature on the latest Squarespace version. However, one can recreate the layout and design of Cover pages using some code to hide the header and footer, essentially creating a “Cover” page look as a result.

071: How to Remove Date From Blog - All Brine Family Templates
There is so much one can do with their Squarespace websites without even going into extra code. This blog and video was inspired by a comment on my YouTube Video for Blog 026 which was about removing the date from blogs in the Hayden and Pacific templates. Here I show you how to do so for all templates in the Brine Family.
There is so much one can do with their Squarespace websites without even going into extra code. This blog and video was inspired by a comment on my YouTube Video for Blog 026 which was about removing the date from blogs in the Hayden and Pacific templates.
How to remove date from blogs in the Brine family templates without code
The short answer is: Go into your Design panel> then Site Styles. Look for all the settings related to Blog. Then under Blog: MetaData, select the primary and secondary options to “None”.
There you go. No code needed. No CSS headache. Of course, this is relevant only for the Brine Family of templates. If you have Hayden or Pacific templates, check out my Blog 026 which shows you what CSS code you need to use and where to paste it.
Is my template in the Brine family of templates?
I will often refer to Brine Family of templates in my videos and blogs. If you want to know whether your template belongs to Brine, look at the chart here and then keep that in mind whenever you are researching for answers. Many bloggers will refer to Brine Family of templates in general so then you will have more answers when searching something on Google or on my blog archive here.
In essence, Brine family of templates is a group of templates that belong together. So anything you can do in one of them, you can do in all of them. This is the template family most favored by my colleagues and web designers in general, because it offers the most optimization possibilities without having to use code. The one big drawback is that it doesn’t allow for a blog sidebar. As you will see on my blog, there is no sidebar as I am using the Rally template (within Brine Family). I am fine with it because it gives my users complete focus on the topic at hand.

You cannot have all the nitty-gritty options that one would otherwise have in the sidebar. My workaround is, I post those things at the bottom of my blogs and then on the main blog page itself, I offer multiple ways to search for content. This works fine for me and I am trusting my website visitors appreciate it too. Helping your readers to focus is quite a nice thing. Focus is good!
Explore in-built options before going for code
In summary: Whenever you want to make a change on your website or are looking for a way to accomplish something visually, your first course of action should be to go into your Design settings and see what possibilities already exist. Squarespace continuously tries to make their web platform as user friendly as possible for DIY’ers (Do-It-Yourself Folks), so they may have already included a way to accomplish exactly what you want within their interface without the need for code. So give that a try before hunting for code.
I hope that this helps you not only to remove the date from your Brine Family template but learn a common practice to adopt in your workflow - see what in-built features already exist inside Squarespace before looking for more complex solutions. Simplicity Rocks!
Your Turn:
What kind of changes are you wanting to make to your website? Chime in, in the comments below. I’d love to hear from you!
~ Sophia

070: 3 Ways to edit your blog on Squarespace
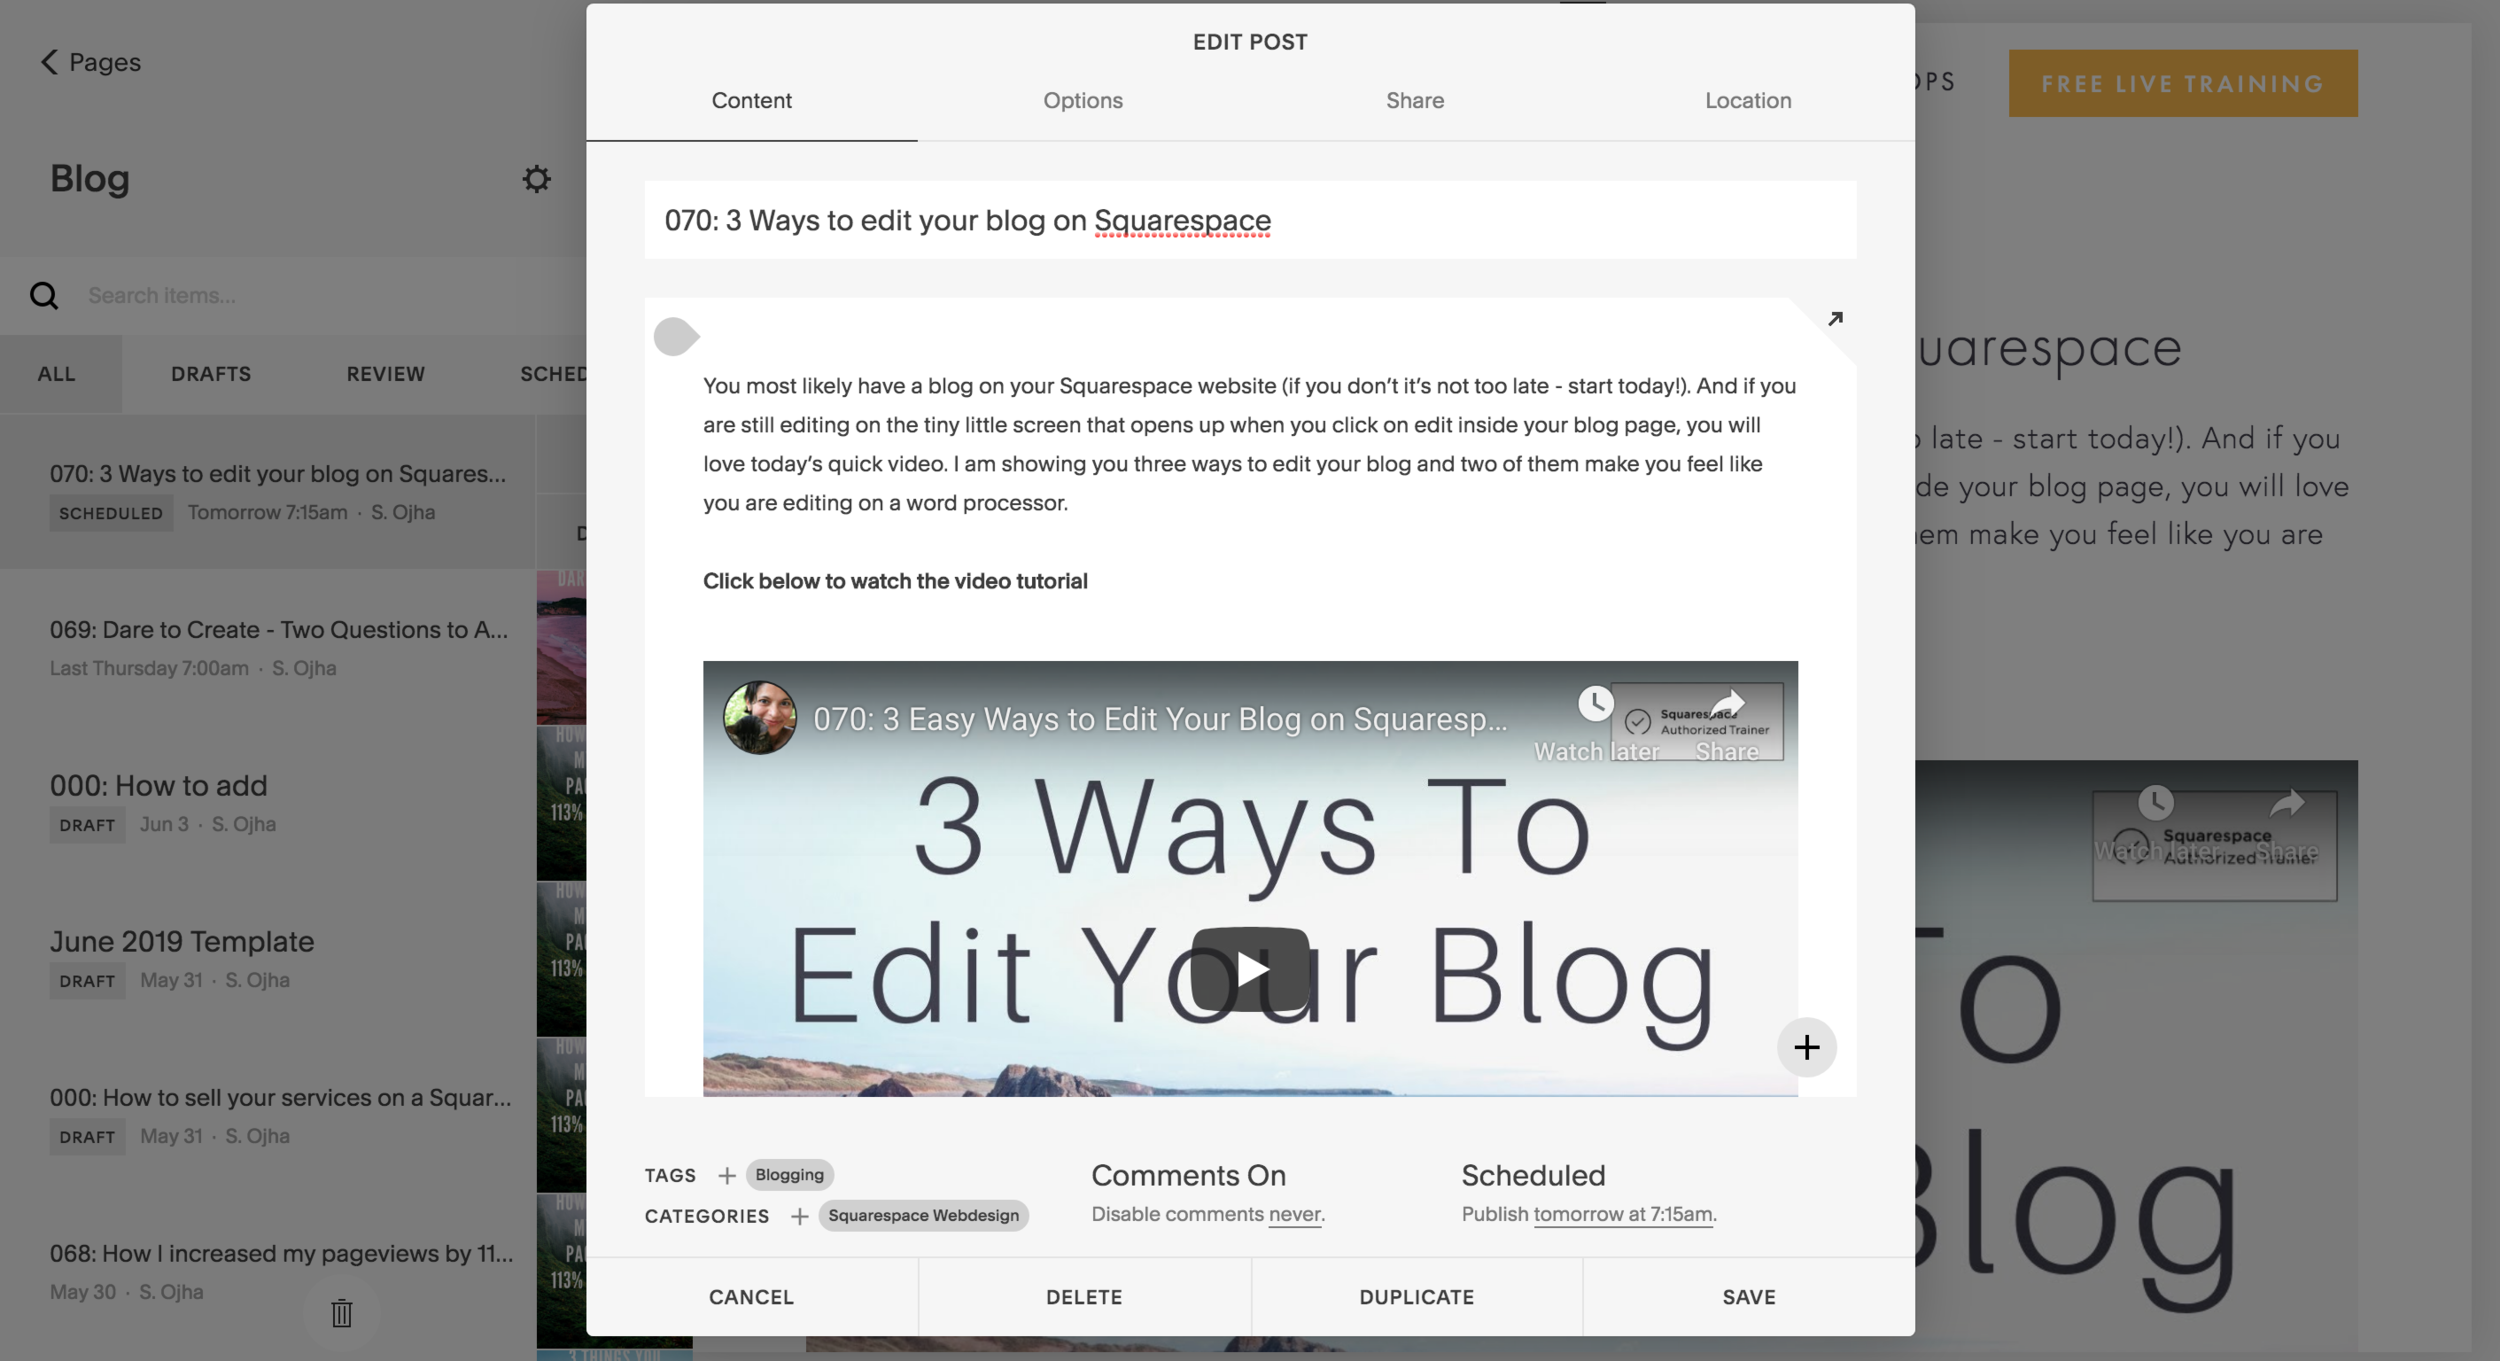
You most likely have a blog on your Squarespace website (if you don’t it’s not too late - start today!). And if you are still editing on the tiny little screen that opens up when you click on edit inside your blog page, you will love today’s quick video. I am showing you three ways to edit your blog and two of them make you feel like you are editing on a word processor.
You most likely have a blog on your Squarespace website (if you don’t it’s not too late - start today!). And if you are still editing on the tiny little screen that opens up when you click on edit inside your blog page, you will love today’s quick video. I am showing you three ways to edit your blog and two of them make you feel like you are editing on a word processor.
Click below to watch the video tutorial
Updating your blog should be quick, easy and fun. If you are used to writing on your word processor in a full-screen mode to remove all distractions, you will love Update Method No. 3.
Update Method No. 1
The first method is to click on “Edit” when you open up your Blog just like the purple arrow is showing you in the image on the right.

It will open up to this box below. It is a tiny frame within which you are now to unleash your creative powers.
Alas, a small tiny box tends to narrow our vision and I personally find it limiting when it comes to writing my blog articles. So I go on to Update Method No. 2.
Update Method No. 2
In this method, instead of clicking the “Edit” in the left sidebar, you are to click “Edit” that shows up in within the small black box above the blog article itself, just like the purple arrow is pointing to in the screenshot below:

It will open up a bigger box like this:

Now that’s much better. But how about this third method that allows you even more screen freedom? Check out Update Method No. 3.
Update Method No. 3
To arrive at the large screen that I’ve been promising so far, you’ll need to first click on Edit in the sidebar (just like in Update Method No. 1). See the purple arrow below:

Then, it will open the tiny box. You need to now click on the arrow on the upper right corner of the tiny box like you see in the image below.

That will open up the page to a full screen mode where you have the wide open canvas to paint with your words, images, video or a combination thereof. This mode allows for the most flexibility and ease when updating your blog post.


It may look like a small detail but when you want to crunch out lots of quality blogs and articles for your content marketing, then having conducive methods will go a long way.
I hope that this video and blog makes editing your blog fun. When you are having fun, you will be more creative and create more and better things for your audience!
Your Turn:
Tell us what you blog about and here’s my invitation to drop in the URL to your website in the comments! Hey, take this up because - free advertising :-) Chime in, in the comments below. I’d love to hear from you!
~ Sophia

064: How to tweak the design of your Mailchimp opt-in form on your Squarespace website?
In this video and blog article, you will see how to make your opt-in form a little more pretty. Change colors of the form or make it completely transparent. You will do this all without any code. All you need is to follow the steps and play around with your settings under Design> Site Styles.
In the last video, you saw a demo of how to embed a Mailchimp opt-in form to collect emails on your Squarespace website. This is an important aspect of your website, so make sure you set up an email marketing system in your business.
Al’right, in this video, you will see how to make your opt-in form a little more pretty. Change colors of the form or make it completely transparent. You will do this all without any code. All you need is to follow the steps and play around with your settings under Design> Site Styles.
Watch the step-by-step video showing you how to do this yourself:
How to tweak the design of your Mailchimp Newsletter Opt-in Form
The video above goes into much greater details but here’s a quick step-by-step checklist for on how to tweak the design of your opt-in form.
|1 Go to Design > Site Styles
|2 Hover over the Newsletter on the right Content Area
|3 You will see the Newsletter Block options in the left panel
|4 Click on Background Color and change it to a color that matches/contrasts with your brand colors
|5 Next change the Alternate Background Color as well to have the same color as in Background Color
|6 Click on Button Color to change it
|7 Click on Alternate Button Color and change it there as well
|8 Under Button> Style Outline to choose Solid, Outline or Raised for the button style
|9 Under Button> Shape to choose Square, Rounded or Pill.
|10 Alternate look: Click on Background Color again and move the lowest circle to the left to make the box disappear or look transparent.
Learn How to Build Your Website on Squarespace:

Well, my friend, I hope you found this blog and tutorial useful. Let me know in the comments if you have questions on this or any other questions about email marketing or about building your website on Squarespace.
Are you getting excited to get your own website? I love designing websites for fabulous people like yourself, so take action to get your website design process started —> Start the Conversation by sharing some ideas about your site with me.
Questions about this blog post? You can drop them in the comments below!
~Peace,
Sophia

061: How to Add Video Clip in the Banner?
Demonstrating a message with moving images rather than just text is a powerful way to set the tone for your site. Adding a video clip to your website’s banner is one way to do that. It creates a certain mood for that specific page and it is easy to set up as you will see in this 3 min video.
How to Add A Video Clip in the Banner of Your Squarespace Website
Demonstrating a message with moving images rather than just text is a powerful way to set the tone for your site. Adding a video clip to your website’s banner is one way to do that. It creates a certain mood for that specific page and it is easy to set up as you will see in this 3 min video:
1| Create the Page You want the Video Banner on
Or if the page is already created, jump to step 2.
2| Click on the Wheel for the Page Settings
This is the icon next to the page name you see in the Pages Panel

3| Jump over to Media
Copy the url of the video you want to play and paste it there. Click save and check how it looks. If it appears narrow like a thin bar, then go into Edit and add a spacer to lengthen the banner. Check the video to where you can visually see how I do this.

Show us what you’ve created!
That’s it, my dear friend! It really is as easy as 1-2-3! I love seeing what you create so hop on down to the comments and show me what you’ve created!
Your Brand New Website!
Are you getting excited to get your own website? I love designing websites for fabulous people like yourself, so take action to get your website design process started —> Start the Conversation by sharing some ideas about your site with me and get a free 15 minute video consultation to discuss your website dreams.
Questions about this blog post? You can drop them in the comments below!
~Peace,
Sophia
